A customer wrote: “We need a microscope (single photon) to study the whole zebrafish’ brain in vivo. We need a 3D rendering of the whole brain, or perhaps in some cases the entire zebrafish. Most likely, light sheet imaging technology, or something similar, is most suitable for us. The spatial resolution requirements are flexible, although of course it would be better to have resolution at the cellular level.
We would like to visualize (3D) the whole brain of the zebrafish at least 1 time per second, or faster. So, a serious question is the motorized stand and the computer control, and/or scanning system. We would like to be able to work with the main fluorescent channels – GFP, YFP and red.
Perhaps you sell just such systems. Could you recommend a suitable system? We would like to purchase individual components and then assemble them ourselves since the budget is important. Is it possible? I think this way we can save the budget and collect exactly what we need.
Can you recommend a suitable system and give an estimated budget?”
Bioimager suggests using low price Biopen SPIM light sheet microscope package which is the commercial version of OPEN-SPIM which was developed by Max-Plank institute initially. We modified and improved it. Its base price for a single channel, single beam is $30k. A dual color with double sided illumination will be near $50k. So you get a fair idea of what functionality and price. You will use ImageJ software. We can offer your desired software with a nice GUI at a reasonable price.
SPIM Principle
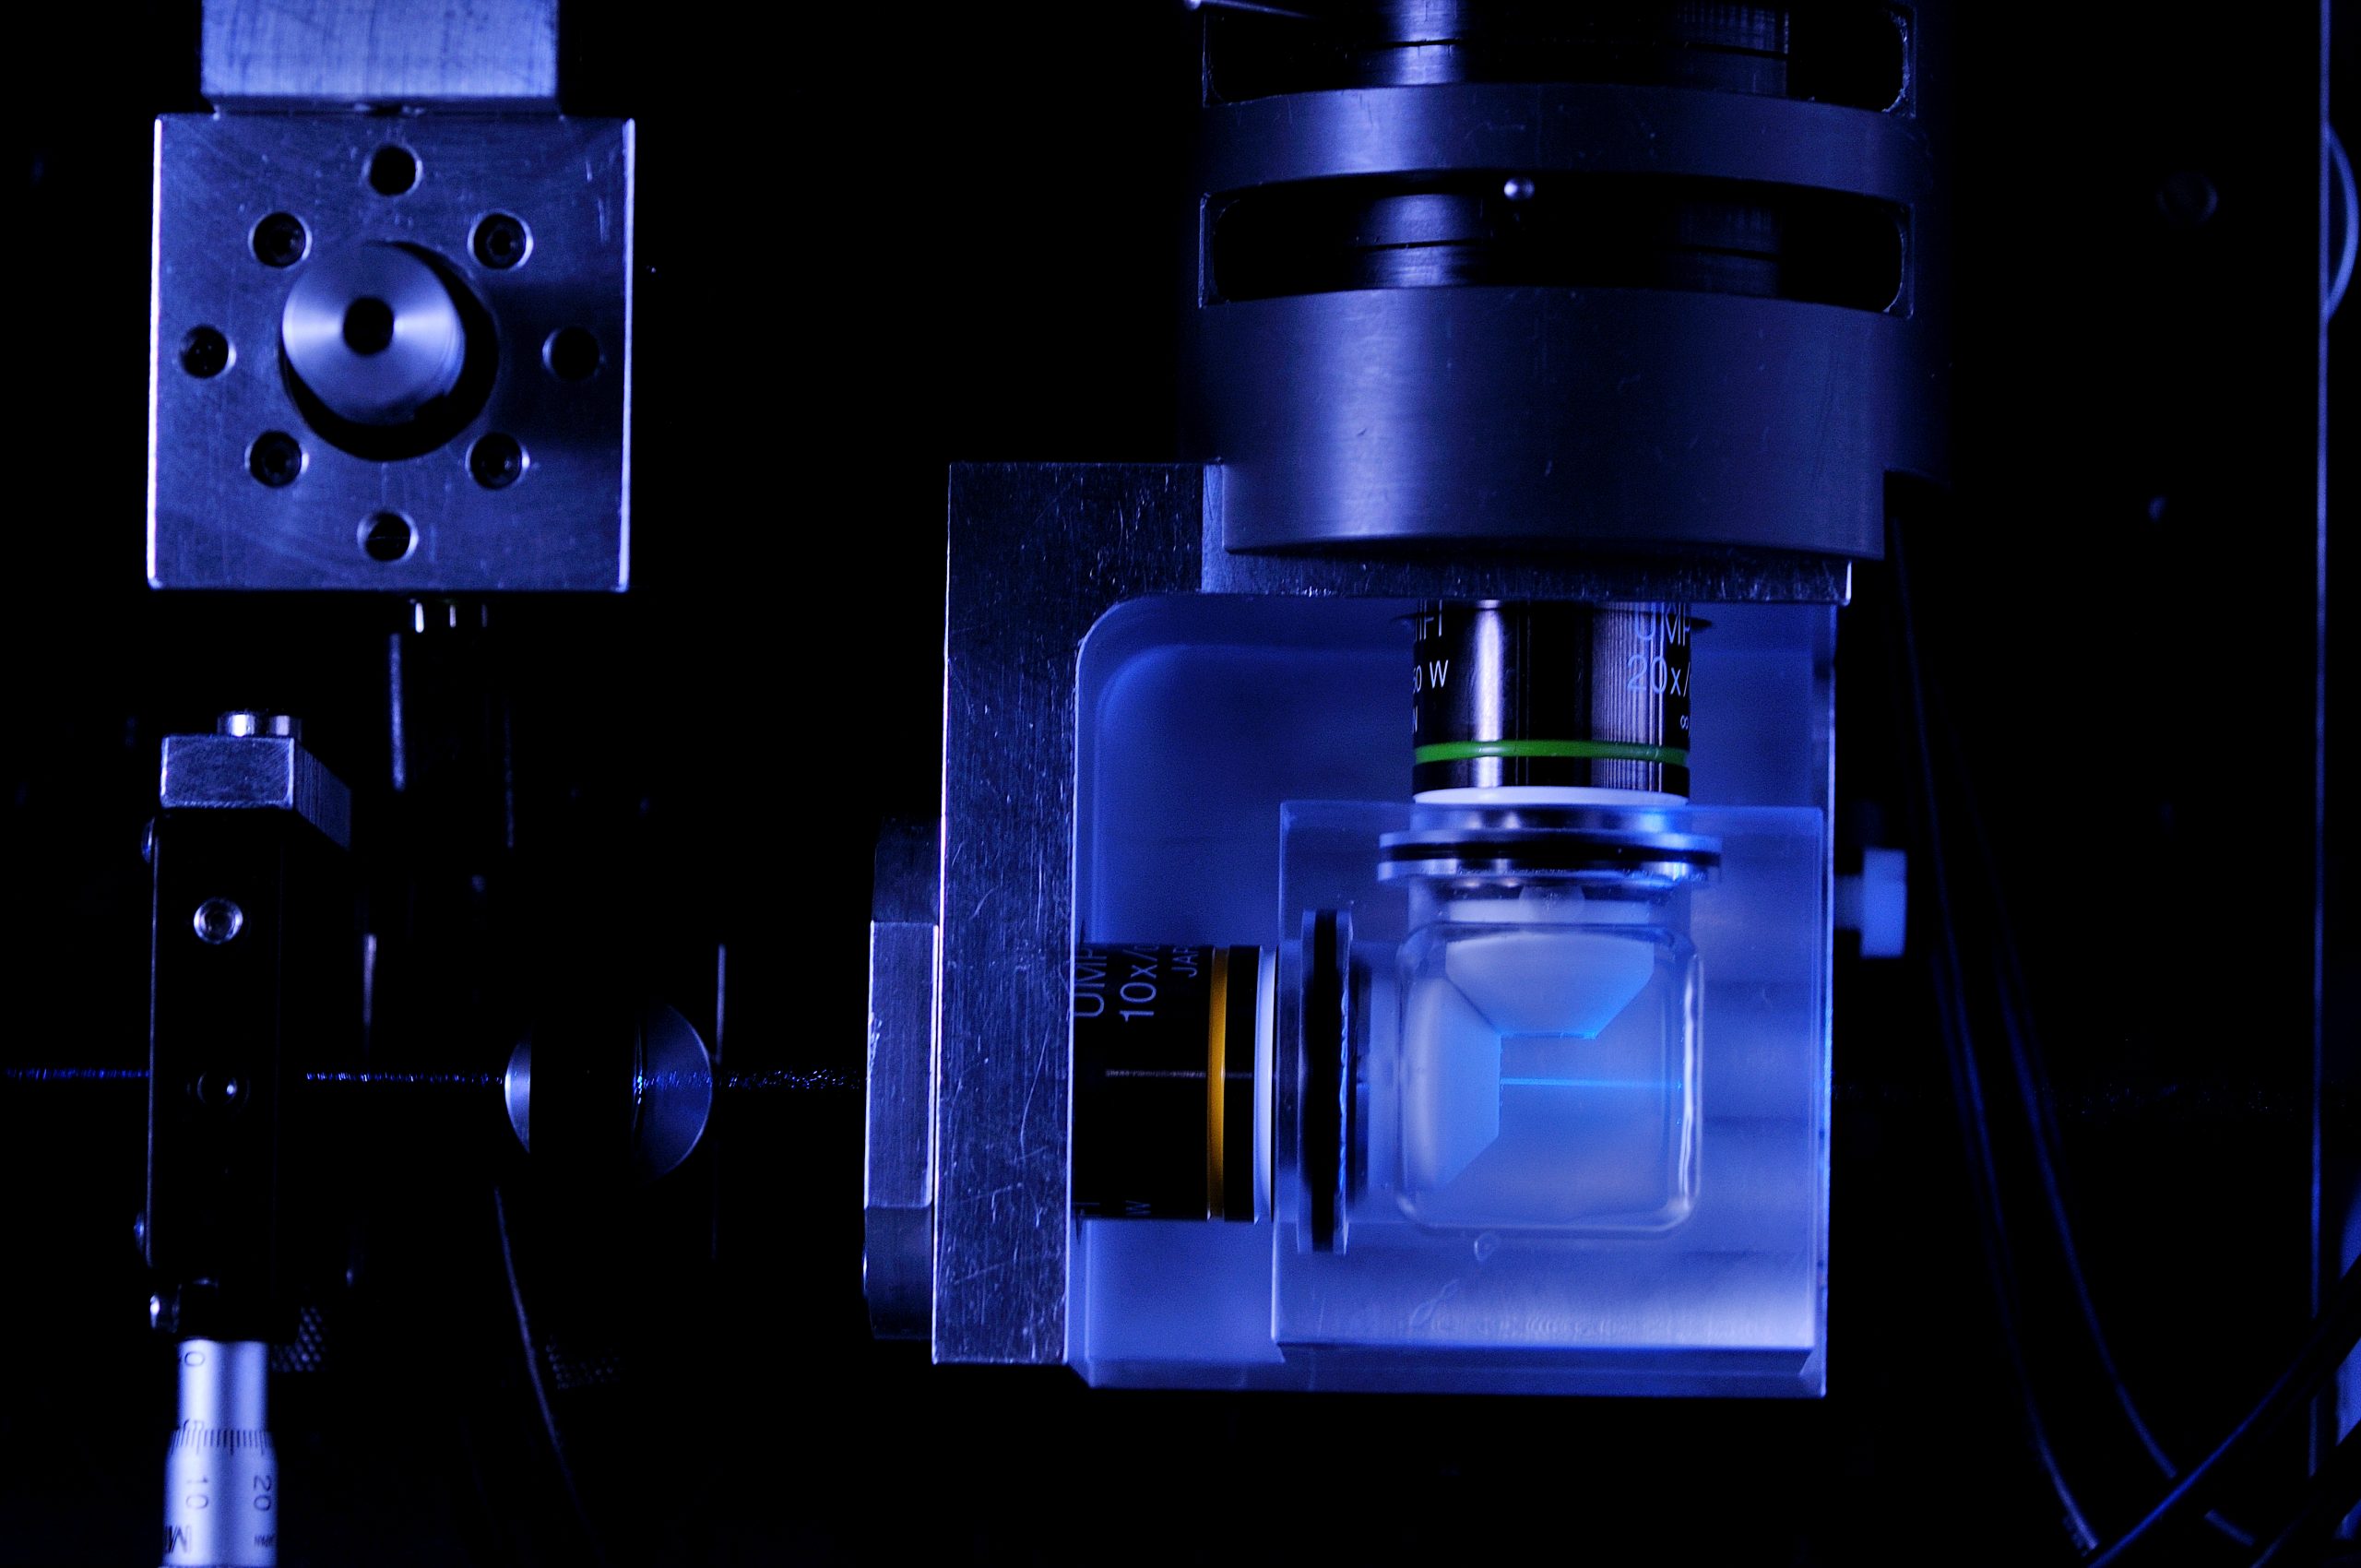
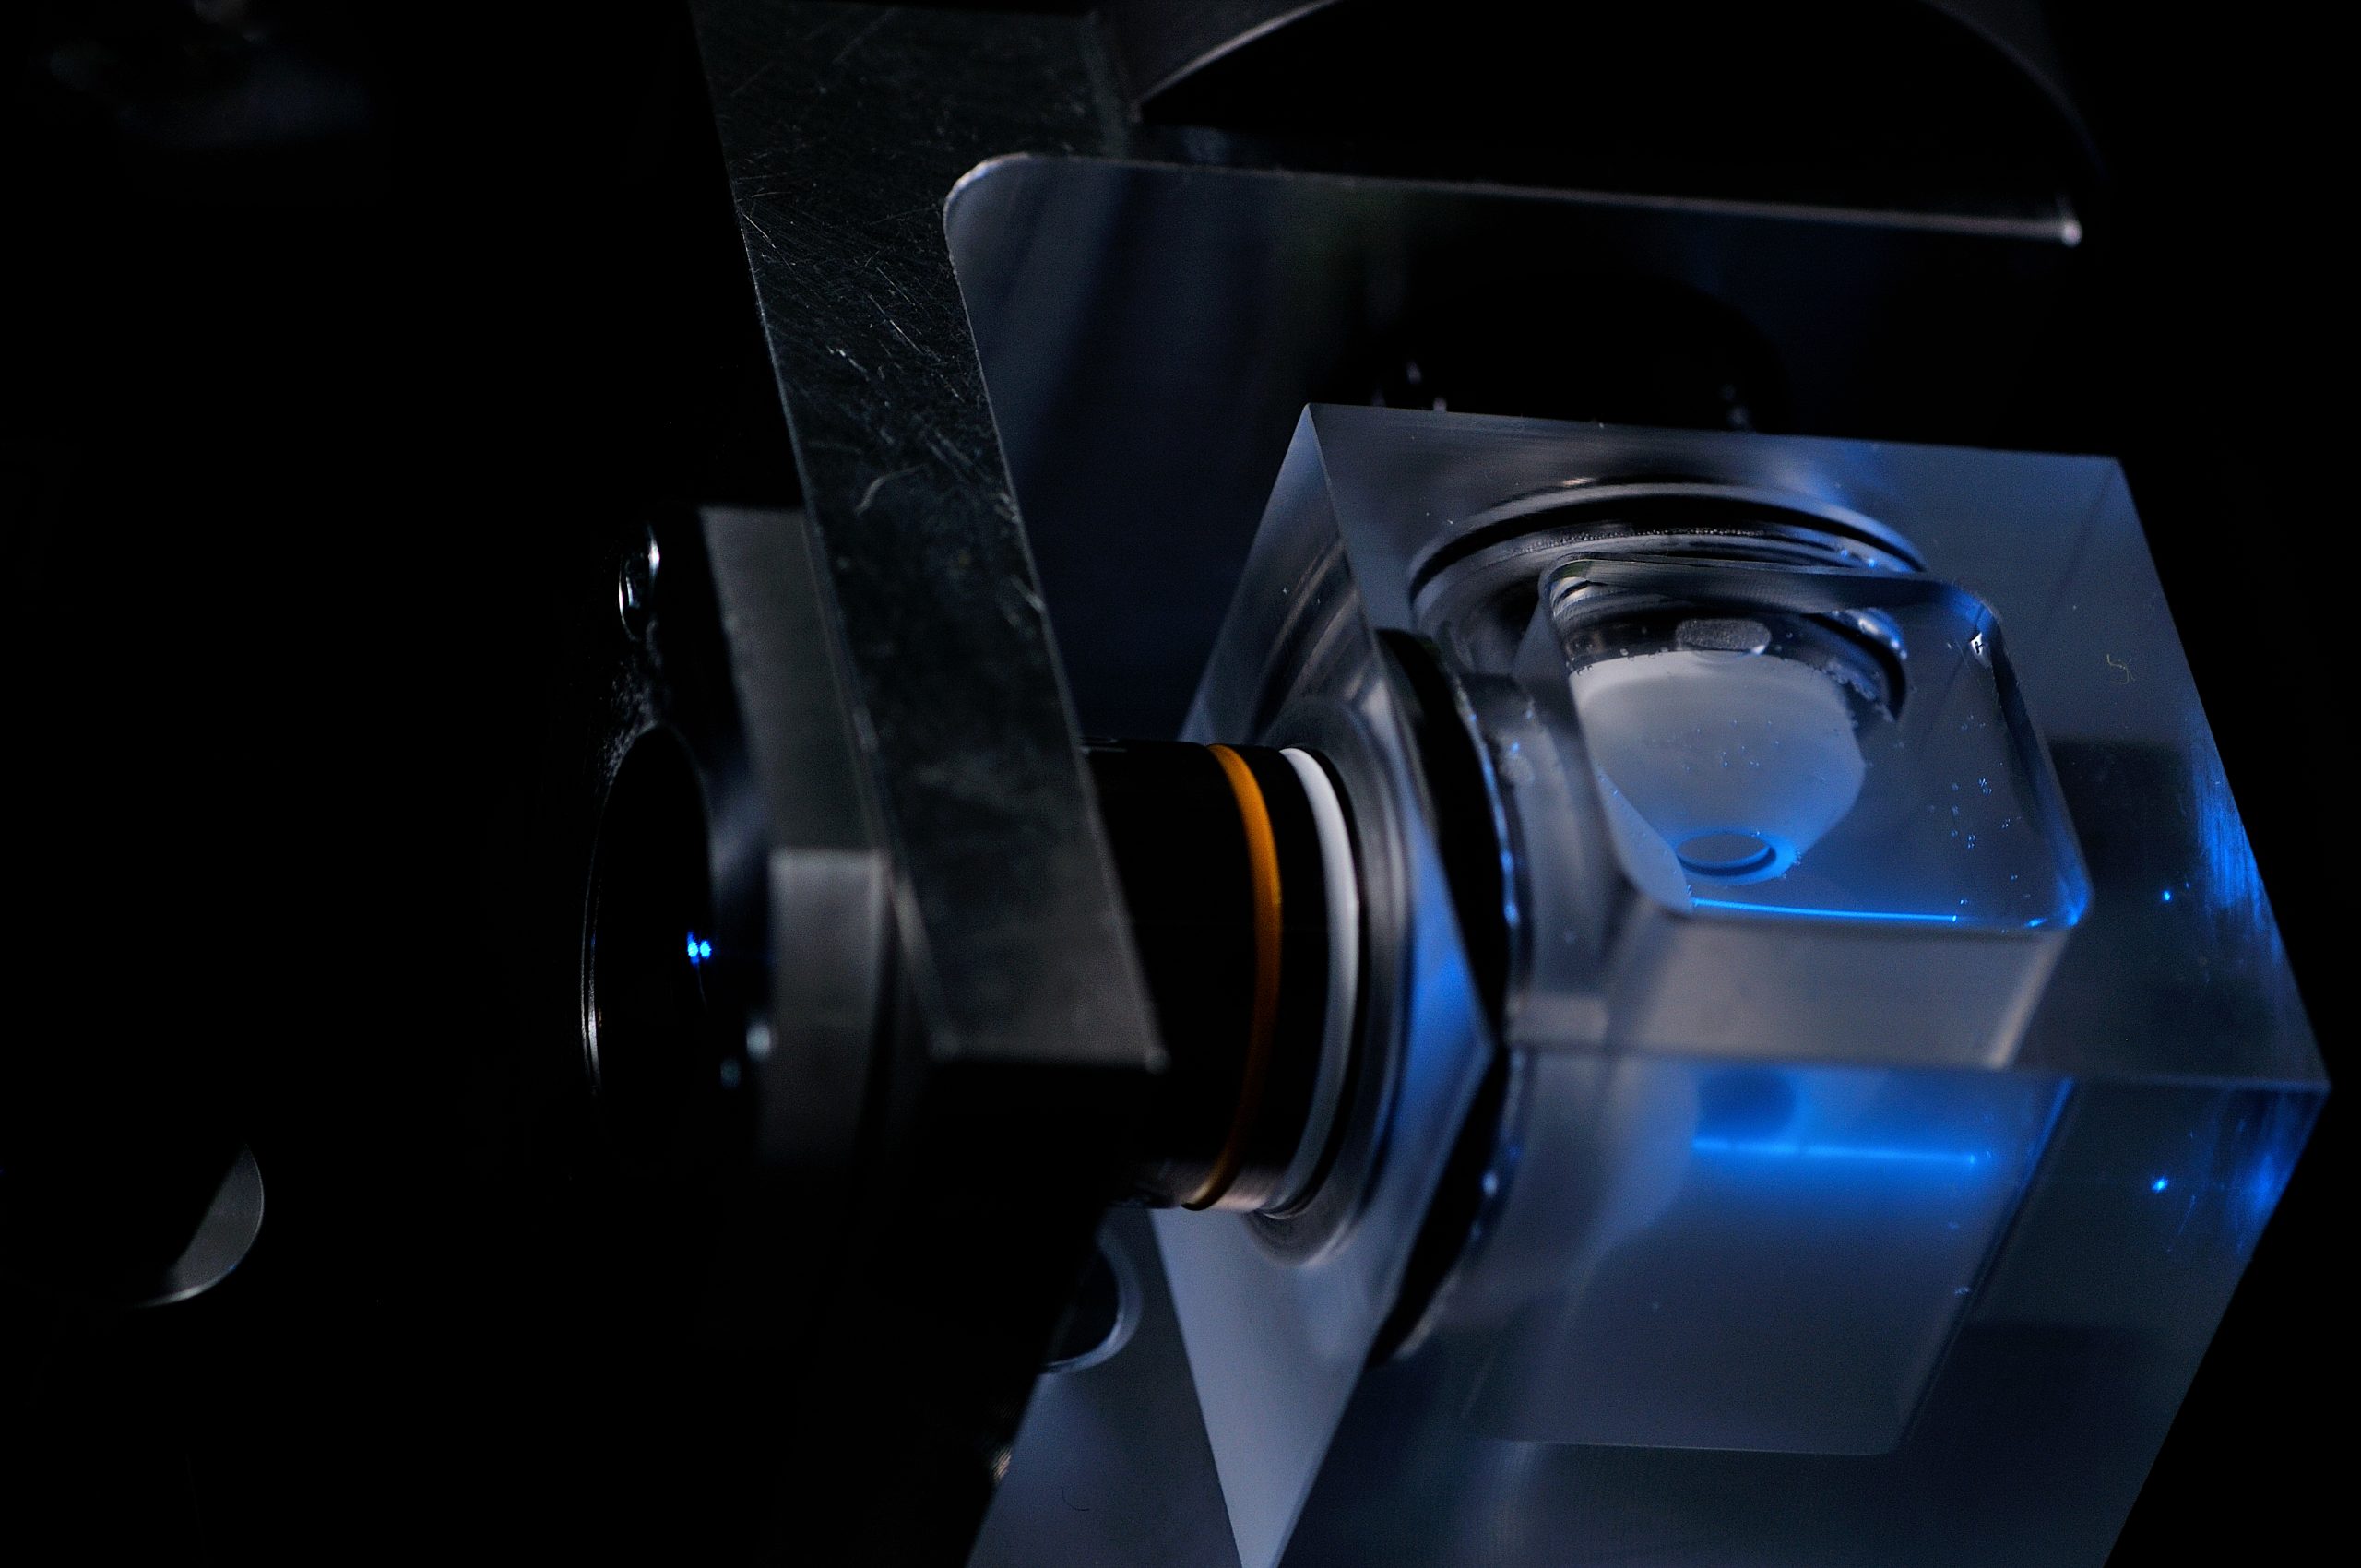
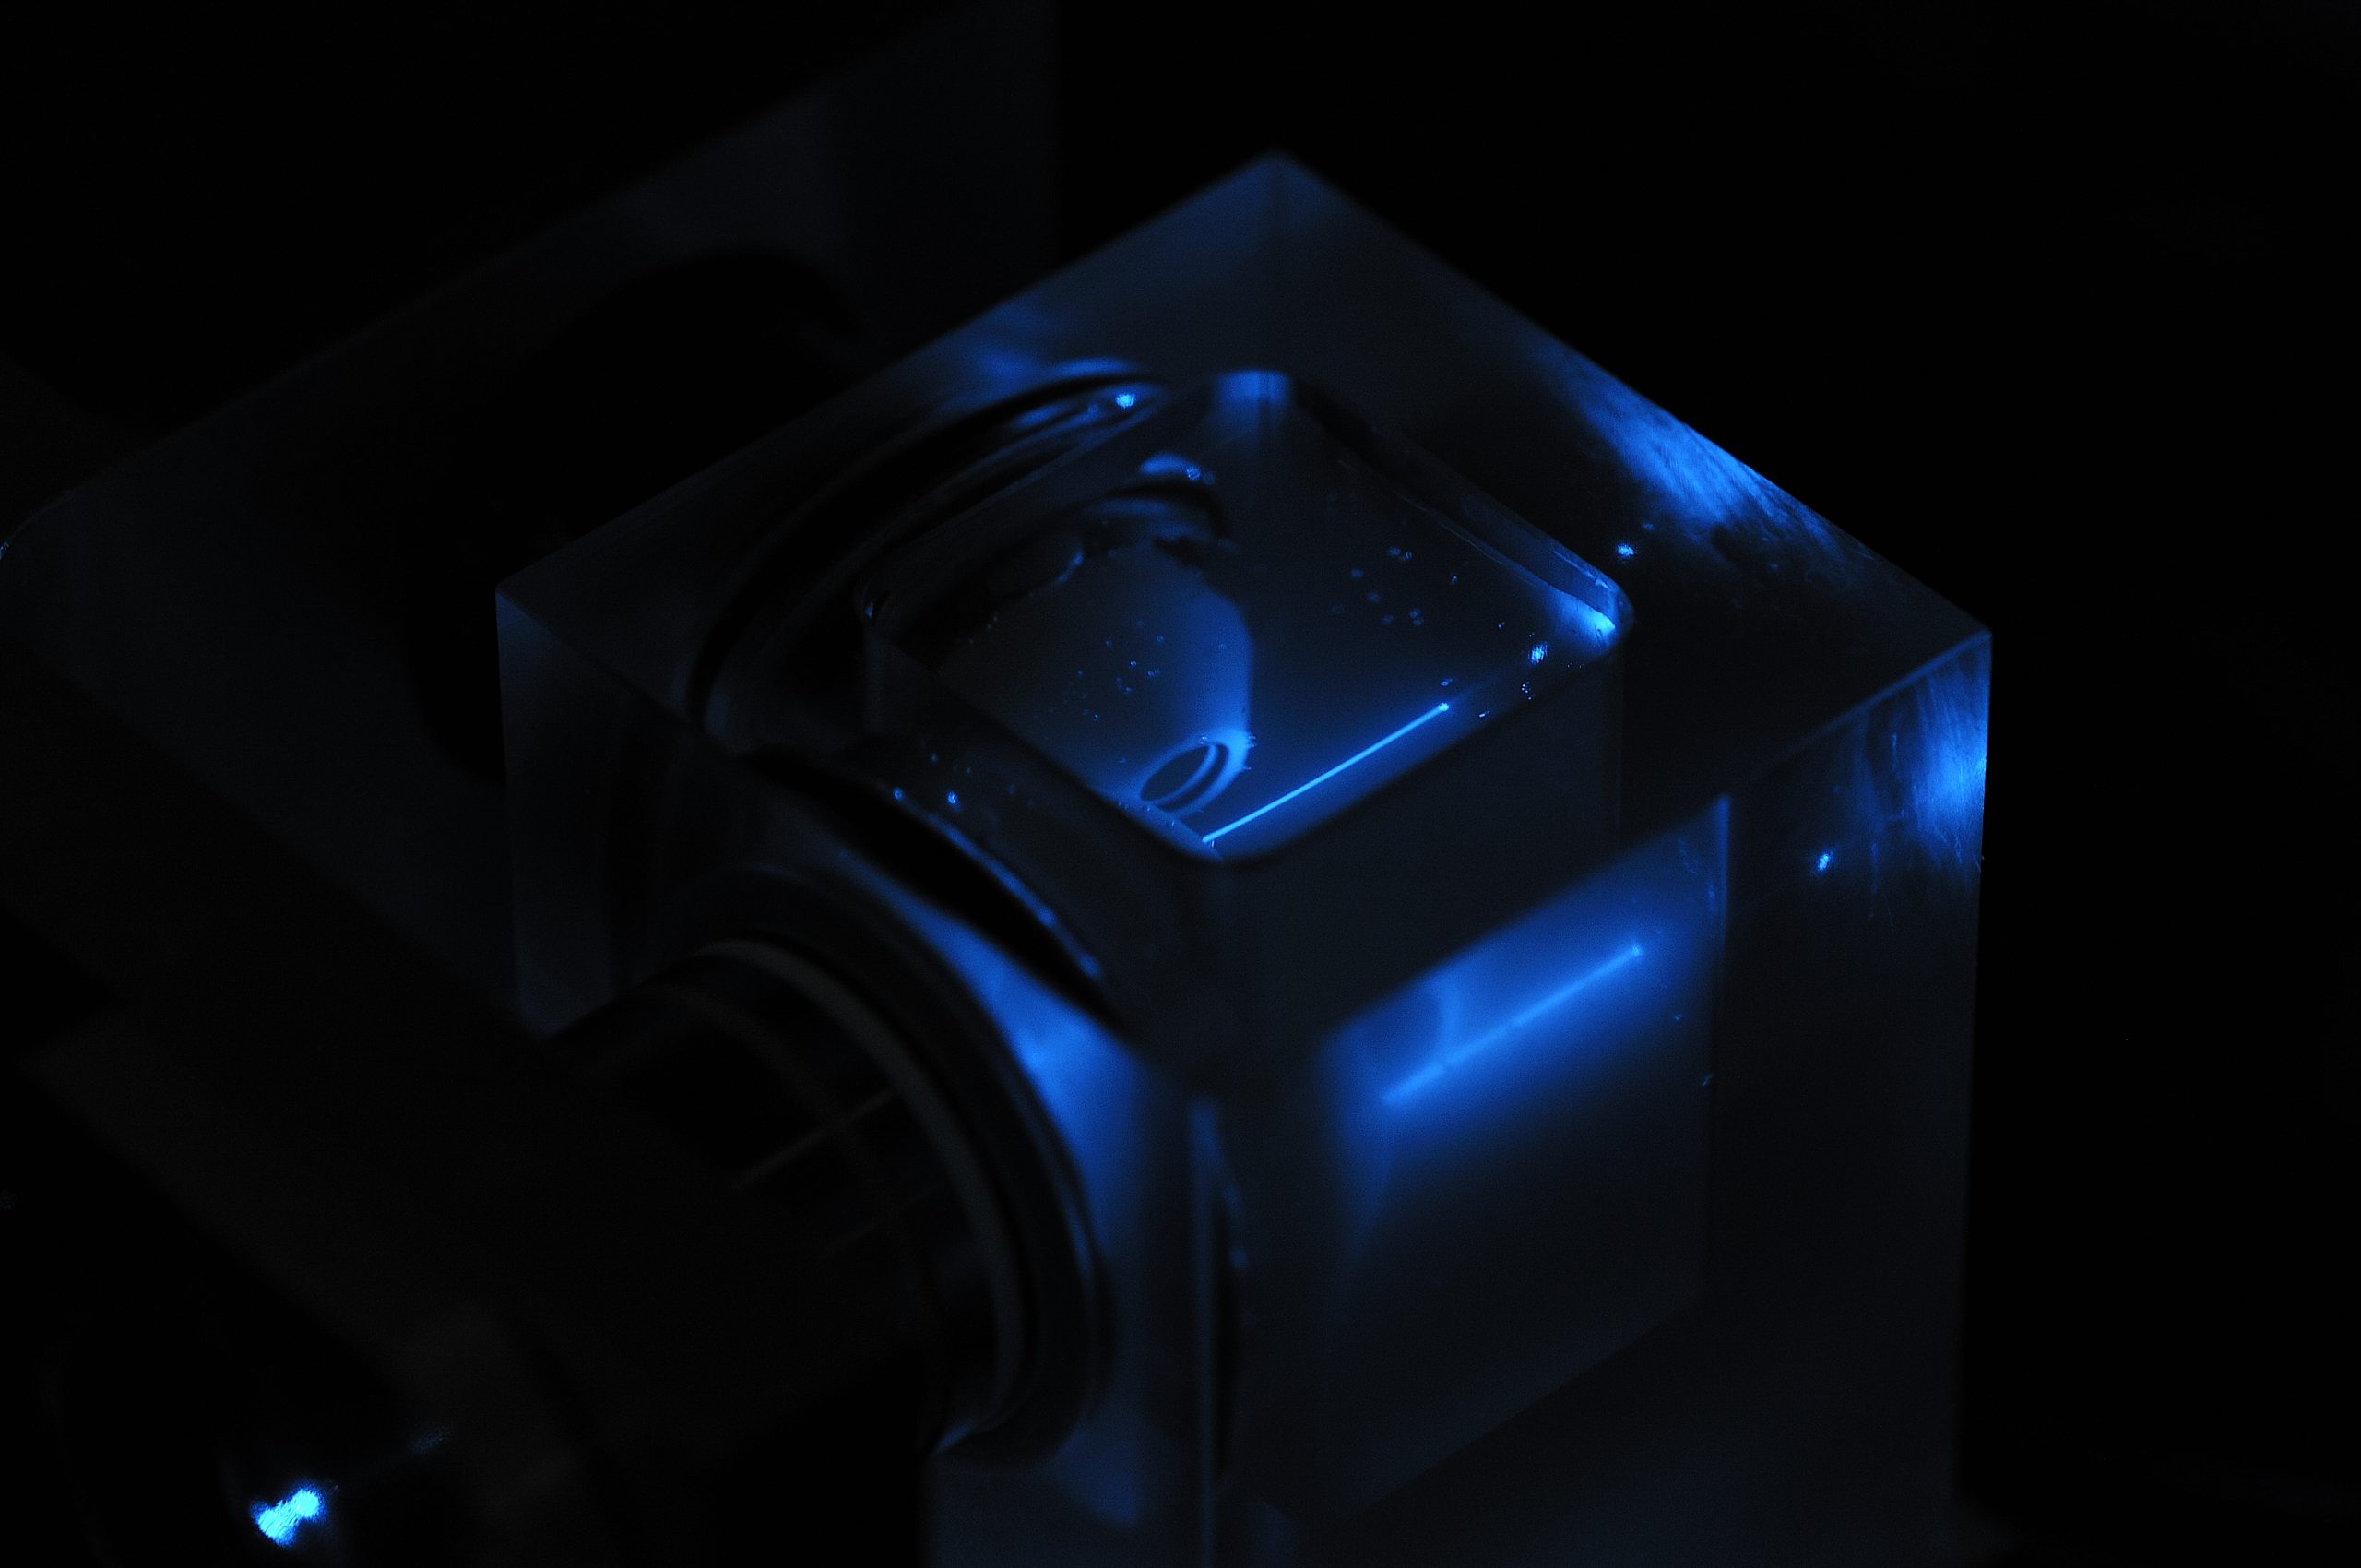
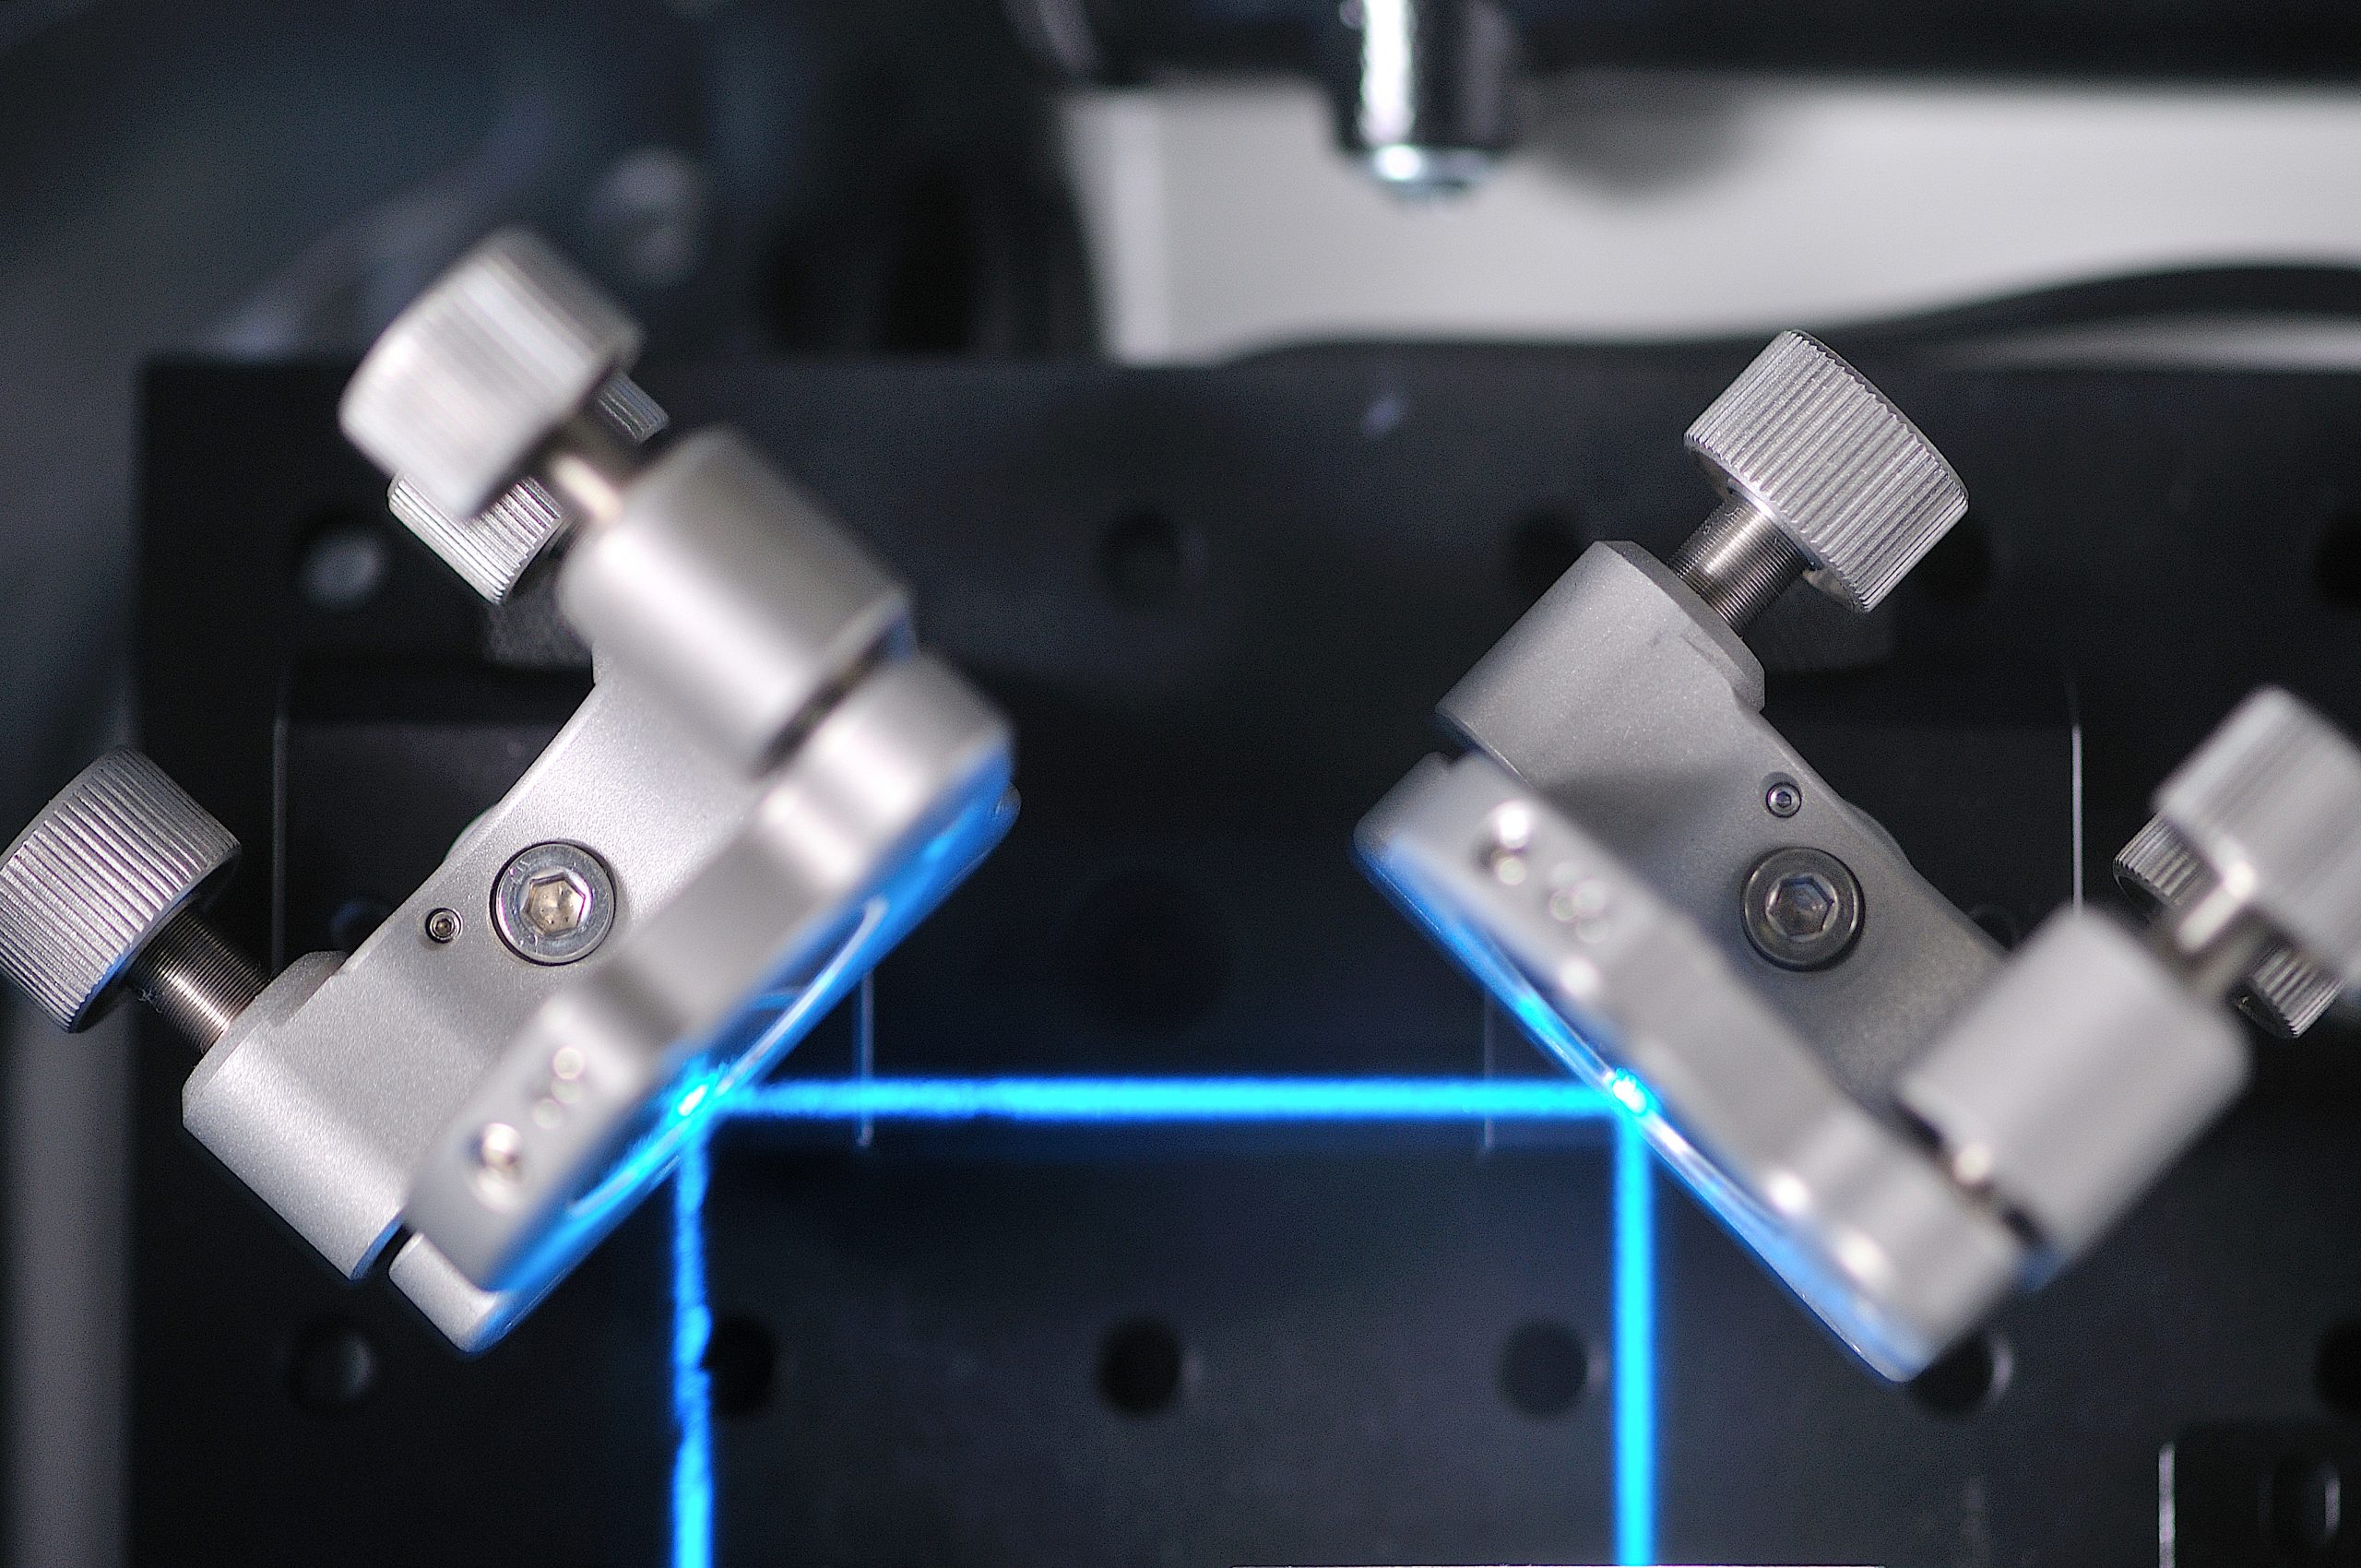
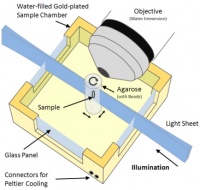
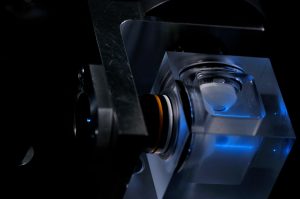
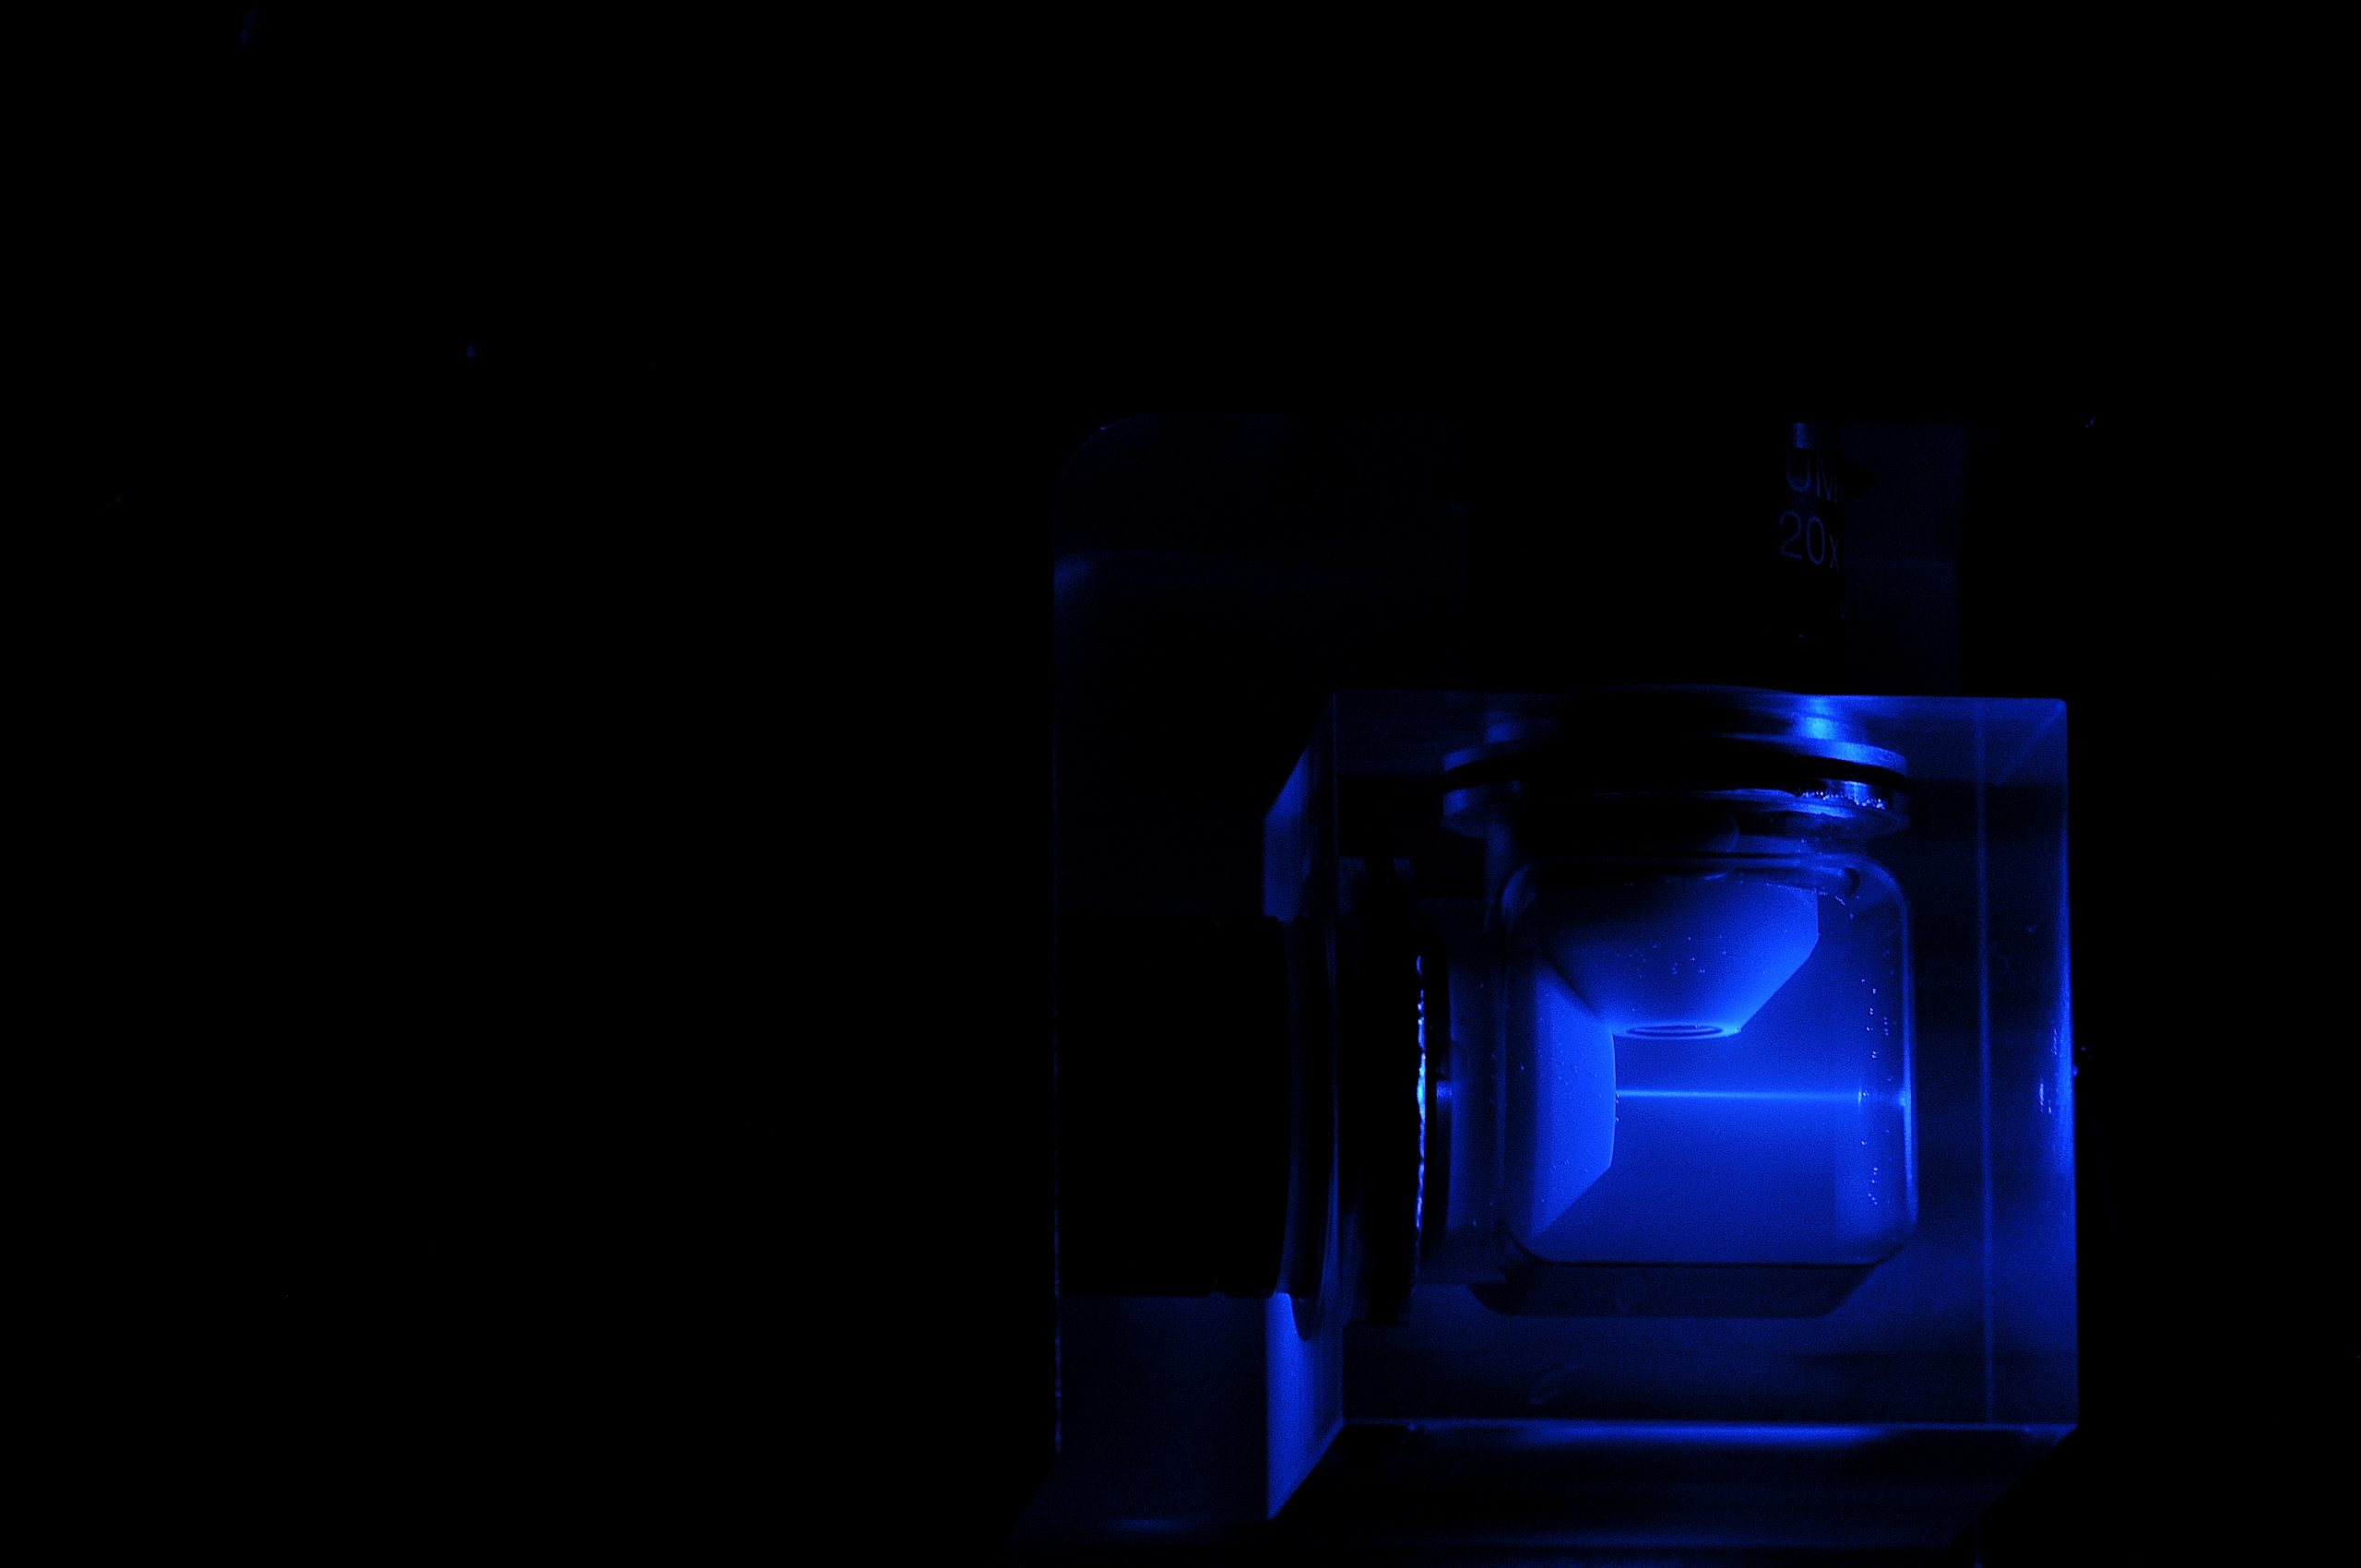
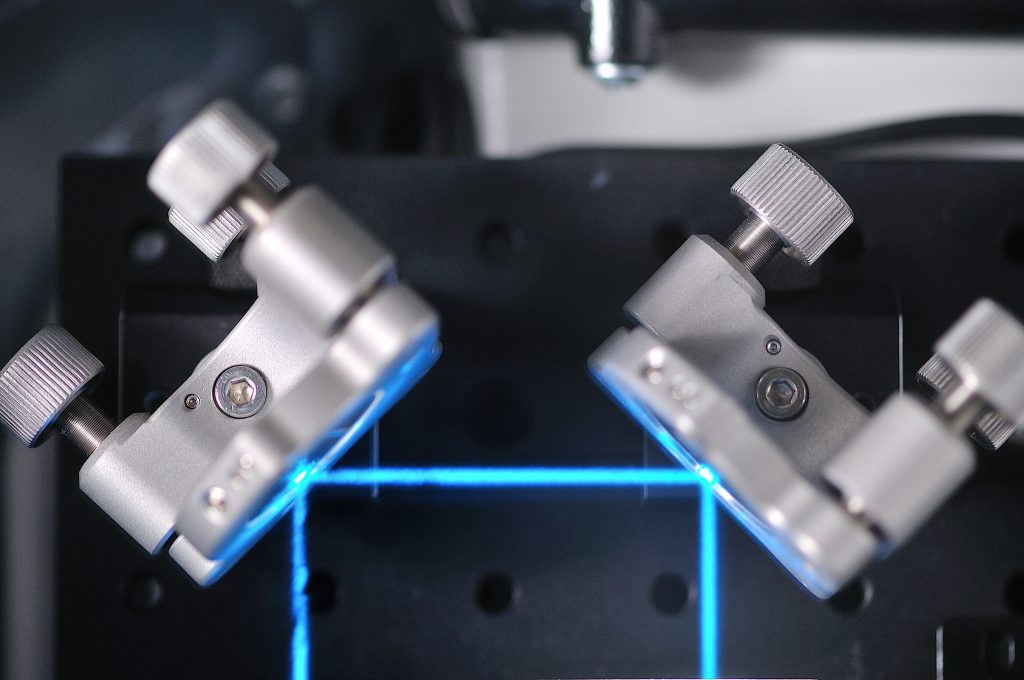
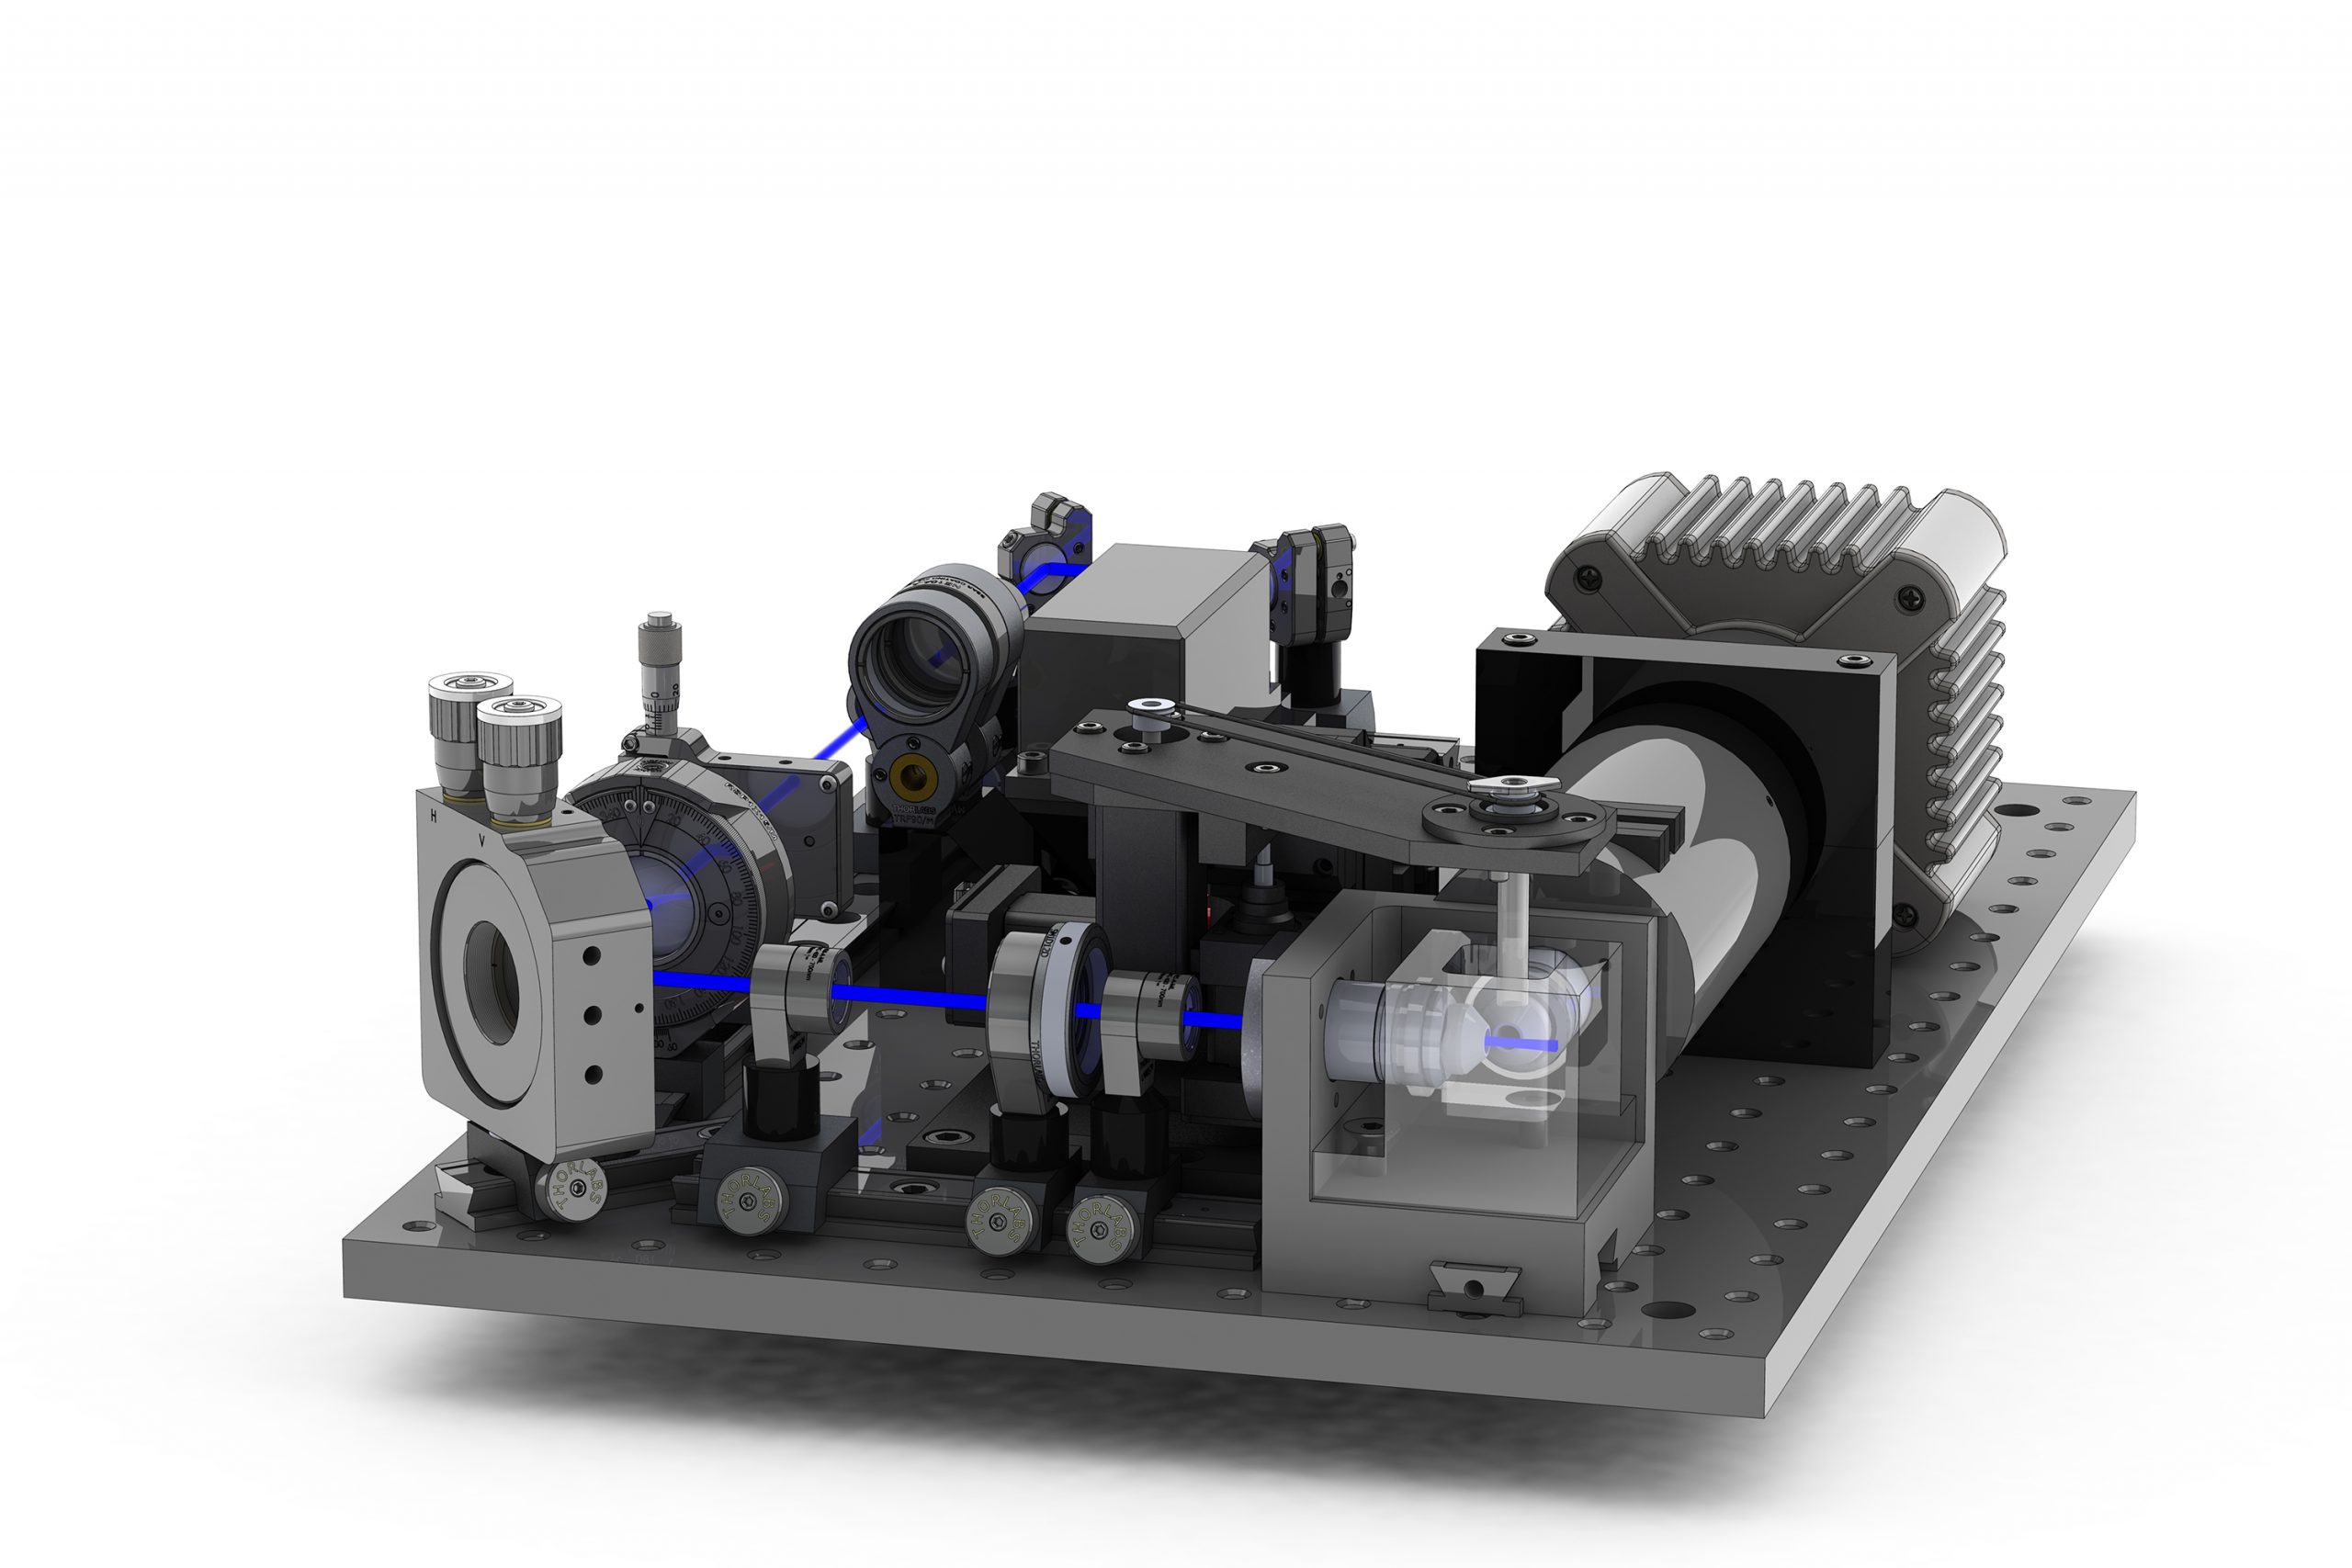
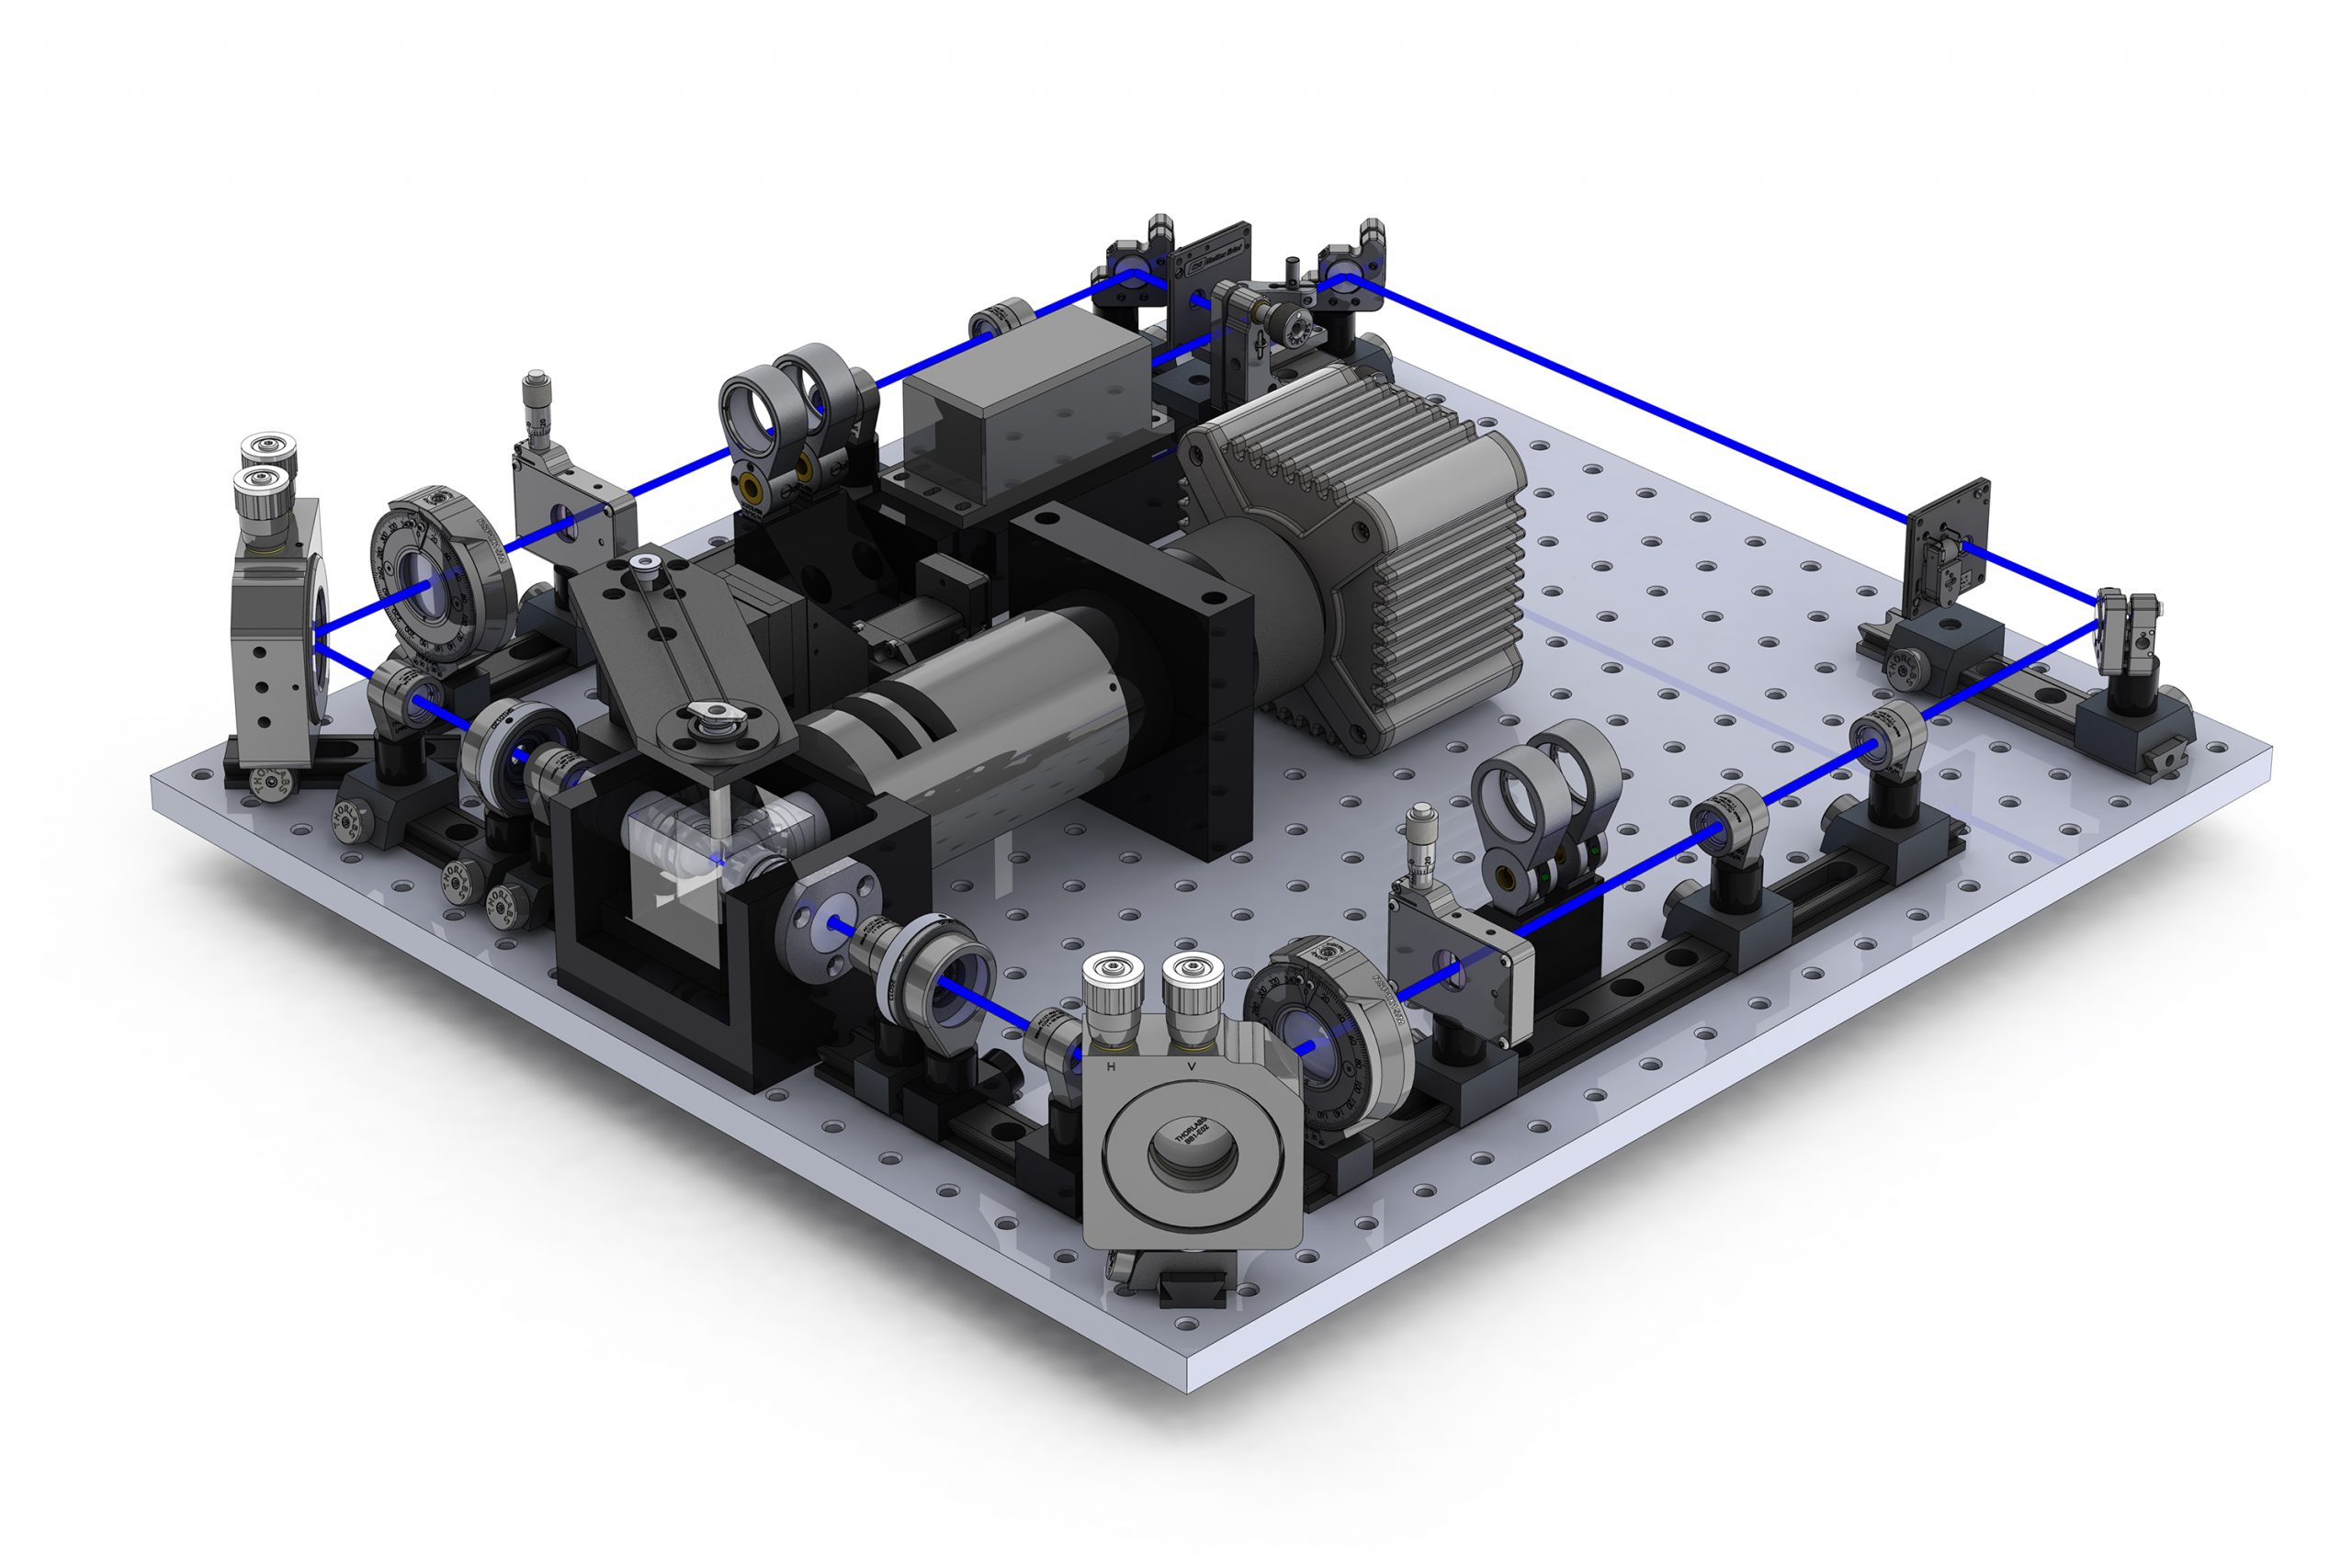
The SPIM technology offers fast, optically-sectioning, minimally-invasive 3D acquisition of fluorescing specimen over time. It achieves that by focusing a thin laser light-sheet into the specimen, taking two-dimensional images of the illuminated slice with a perpendicularly positioned detector (CCD camera). Three-dimensional stacks are obtained by moving the specimen orthogonal to the light-sheet between consecutive images. By mounting the sample in a rigid medium, e.g. agarose, and hanging it into the sample chamber in front of the detection lens, it is possible to rotate the sample and collect 3d stacks from multiple angles (views).
SPIM Applications
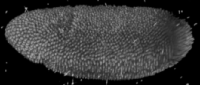
SPIM promises to revolutionize several fields of biological research, in particular developmental and cell biology, by allowing imaging of large samples with high resolution over extended periods of time. SPIM has been used in a spectacular fashion to record the development of embryos of model organisms such as Drosophila and zebra fish with cellular resolution throughout the developing specimen (the so-called in toto imaging). The ability of SPIM to deliver high signal-to-noise 3D images of large specimen from different angles in an extended time-lapse is currently hard to achieve with any other microscopy technology. Since monitoring biological systems with high resolution over time is the goal of essentially all fields of biological inquiry, SPIM technology is imminently useful to biologists.
Features
Customizable light-sheet microscope based on your application and budget
The lowest price and most compact lightsheet microscope in the market
Automated XY, Z and R (rotation)
Customized chamber(s) according to the client’s sample(s)
Big list of filters and lasers from UV to IR is available
Objective lenses: 4x, 10x, 20x, 40x
Camera: CMOS, CCD, sCMOS
MicroManager Software
Easy Upgradable from single to two colors, anytime
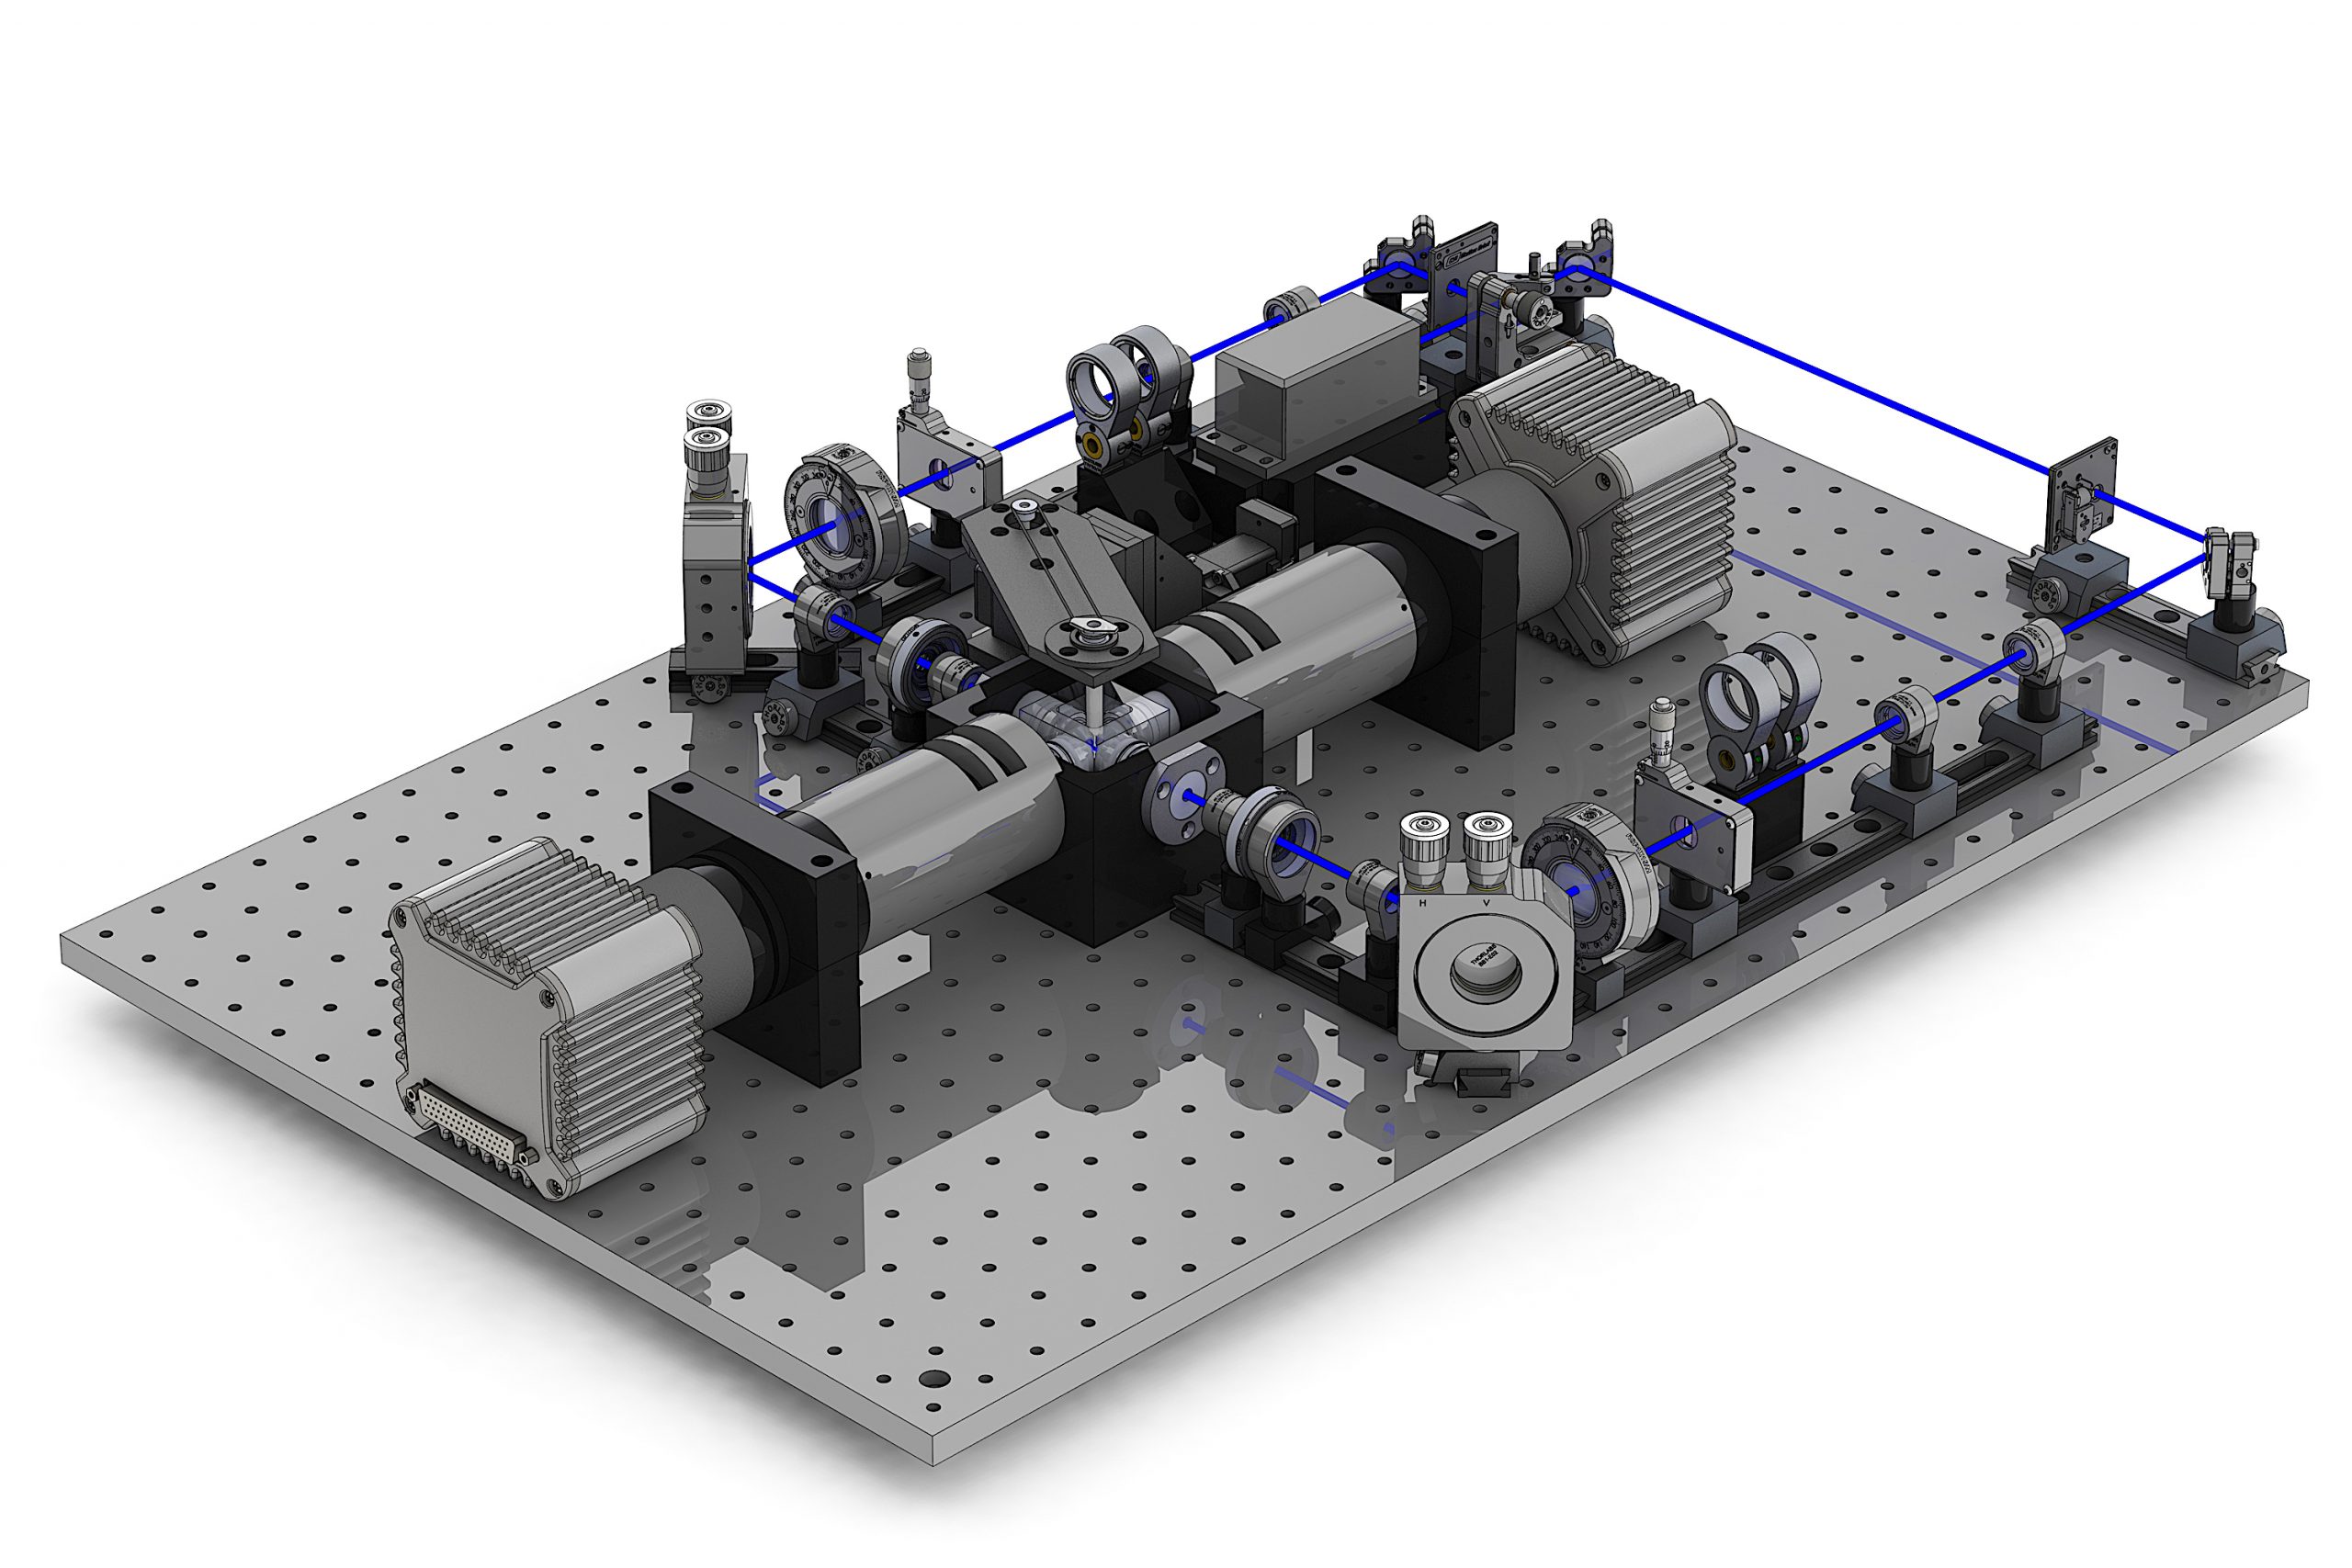
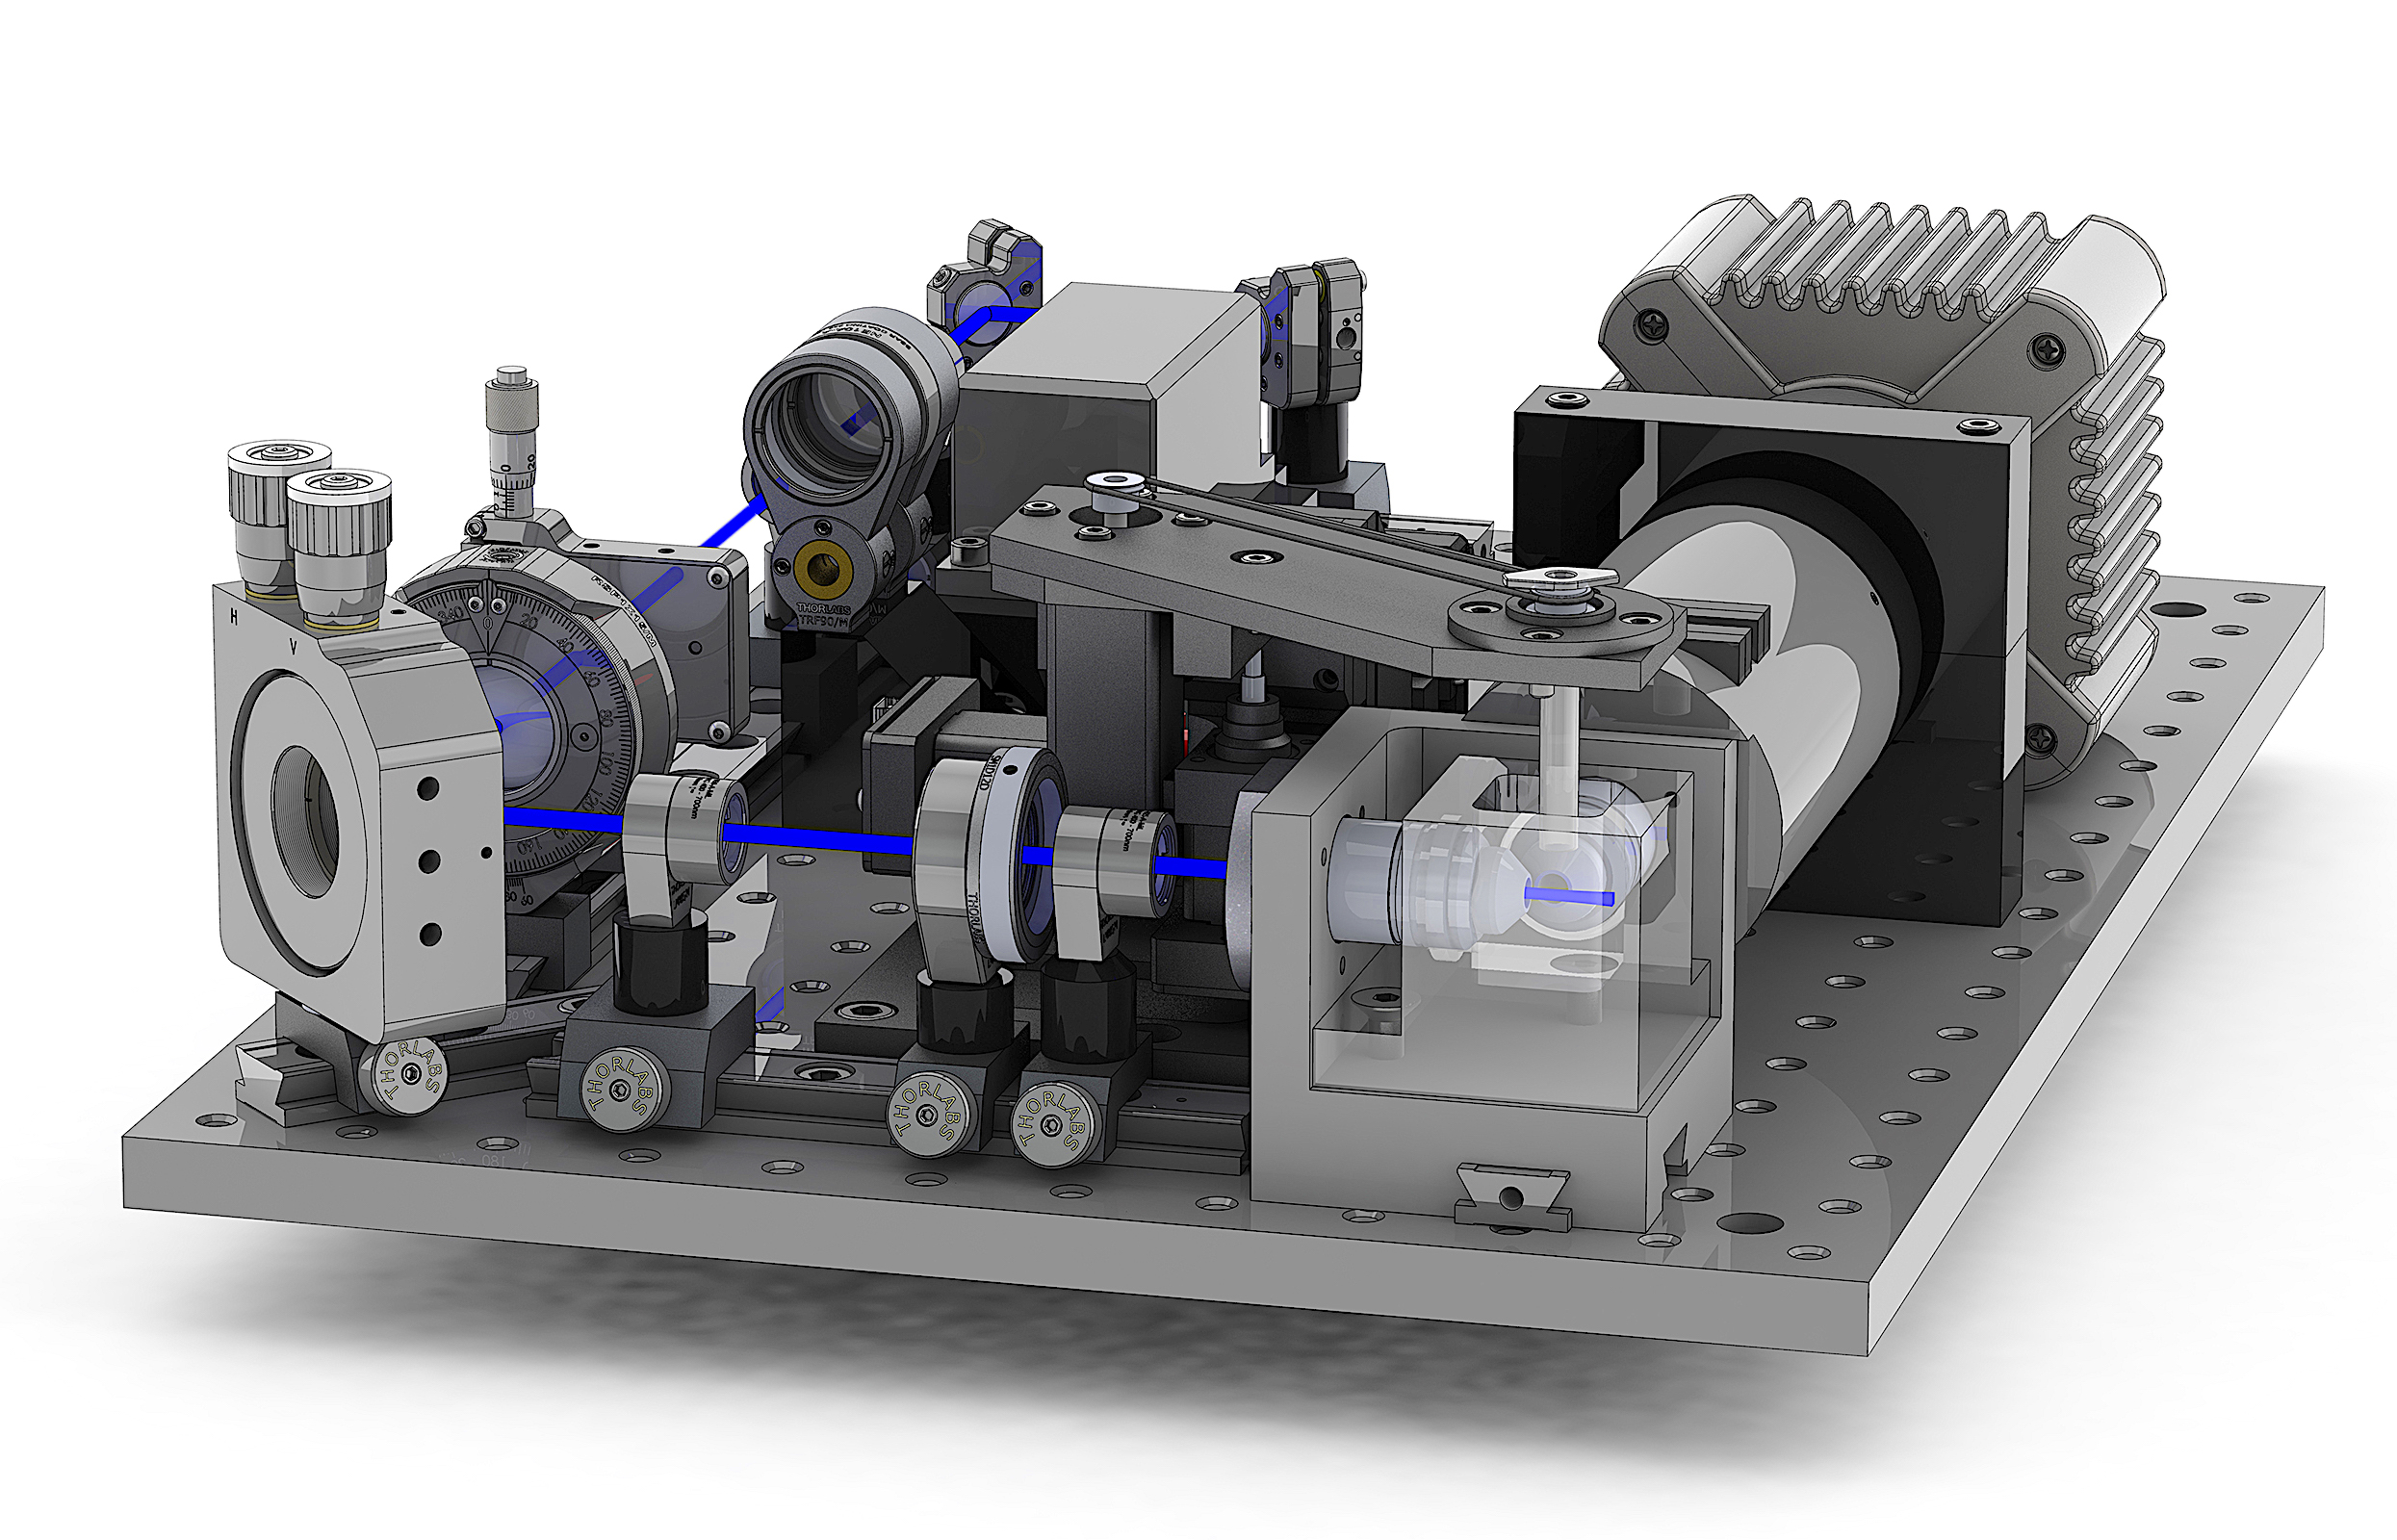
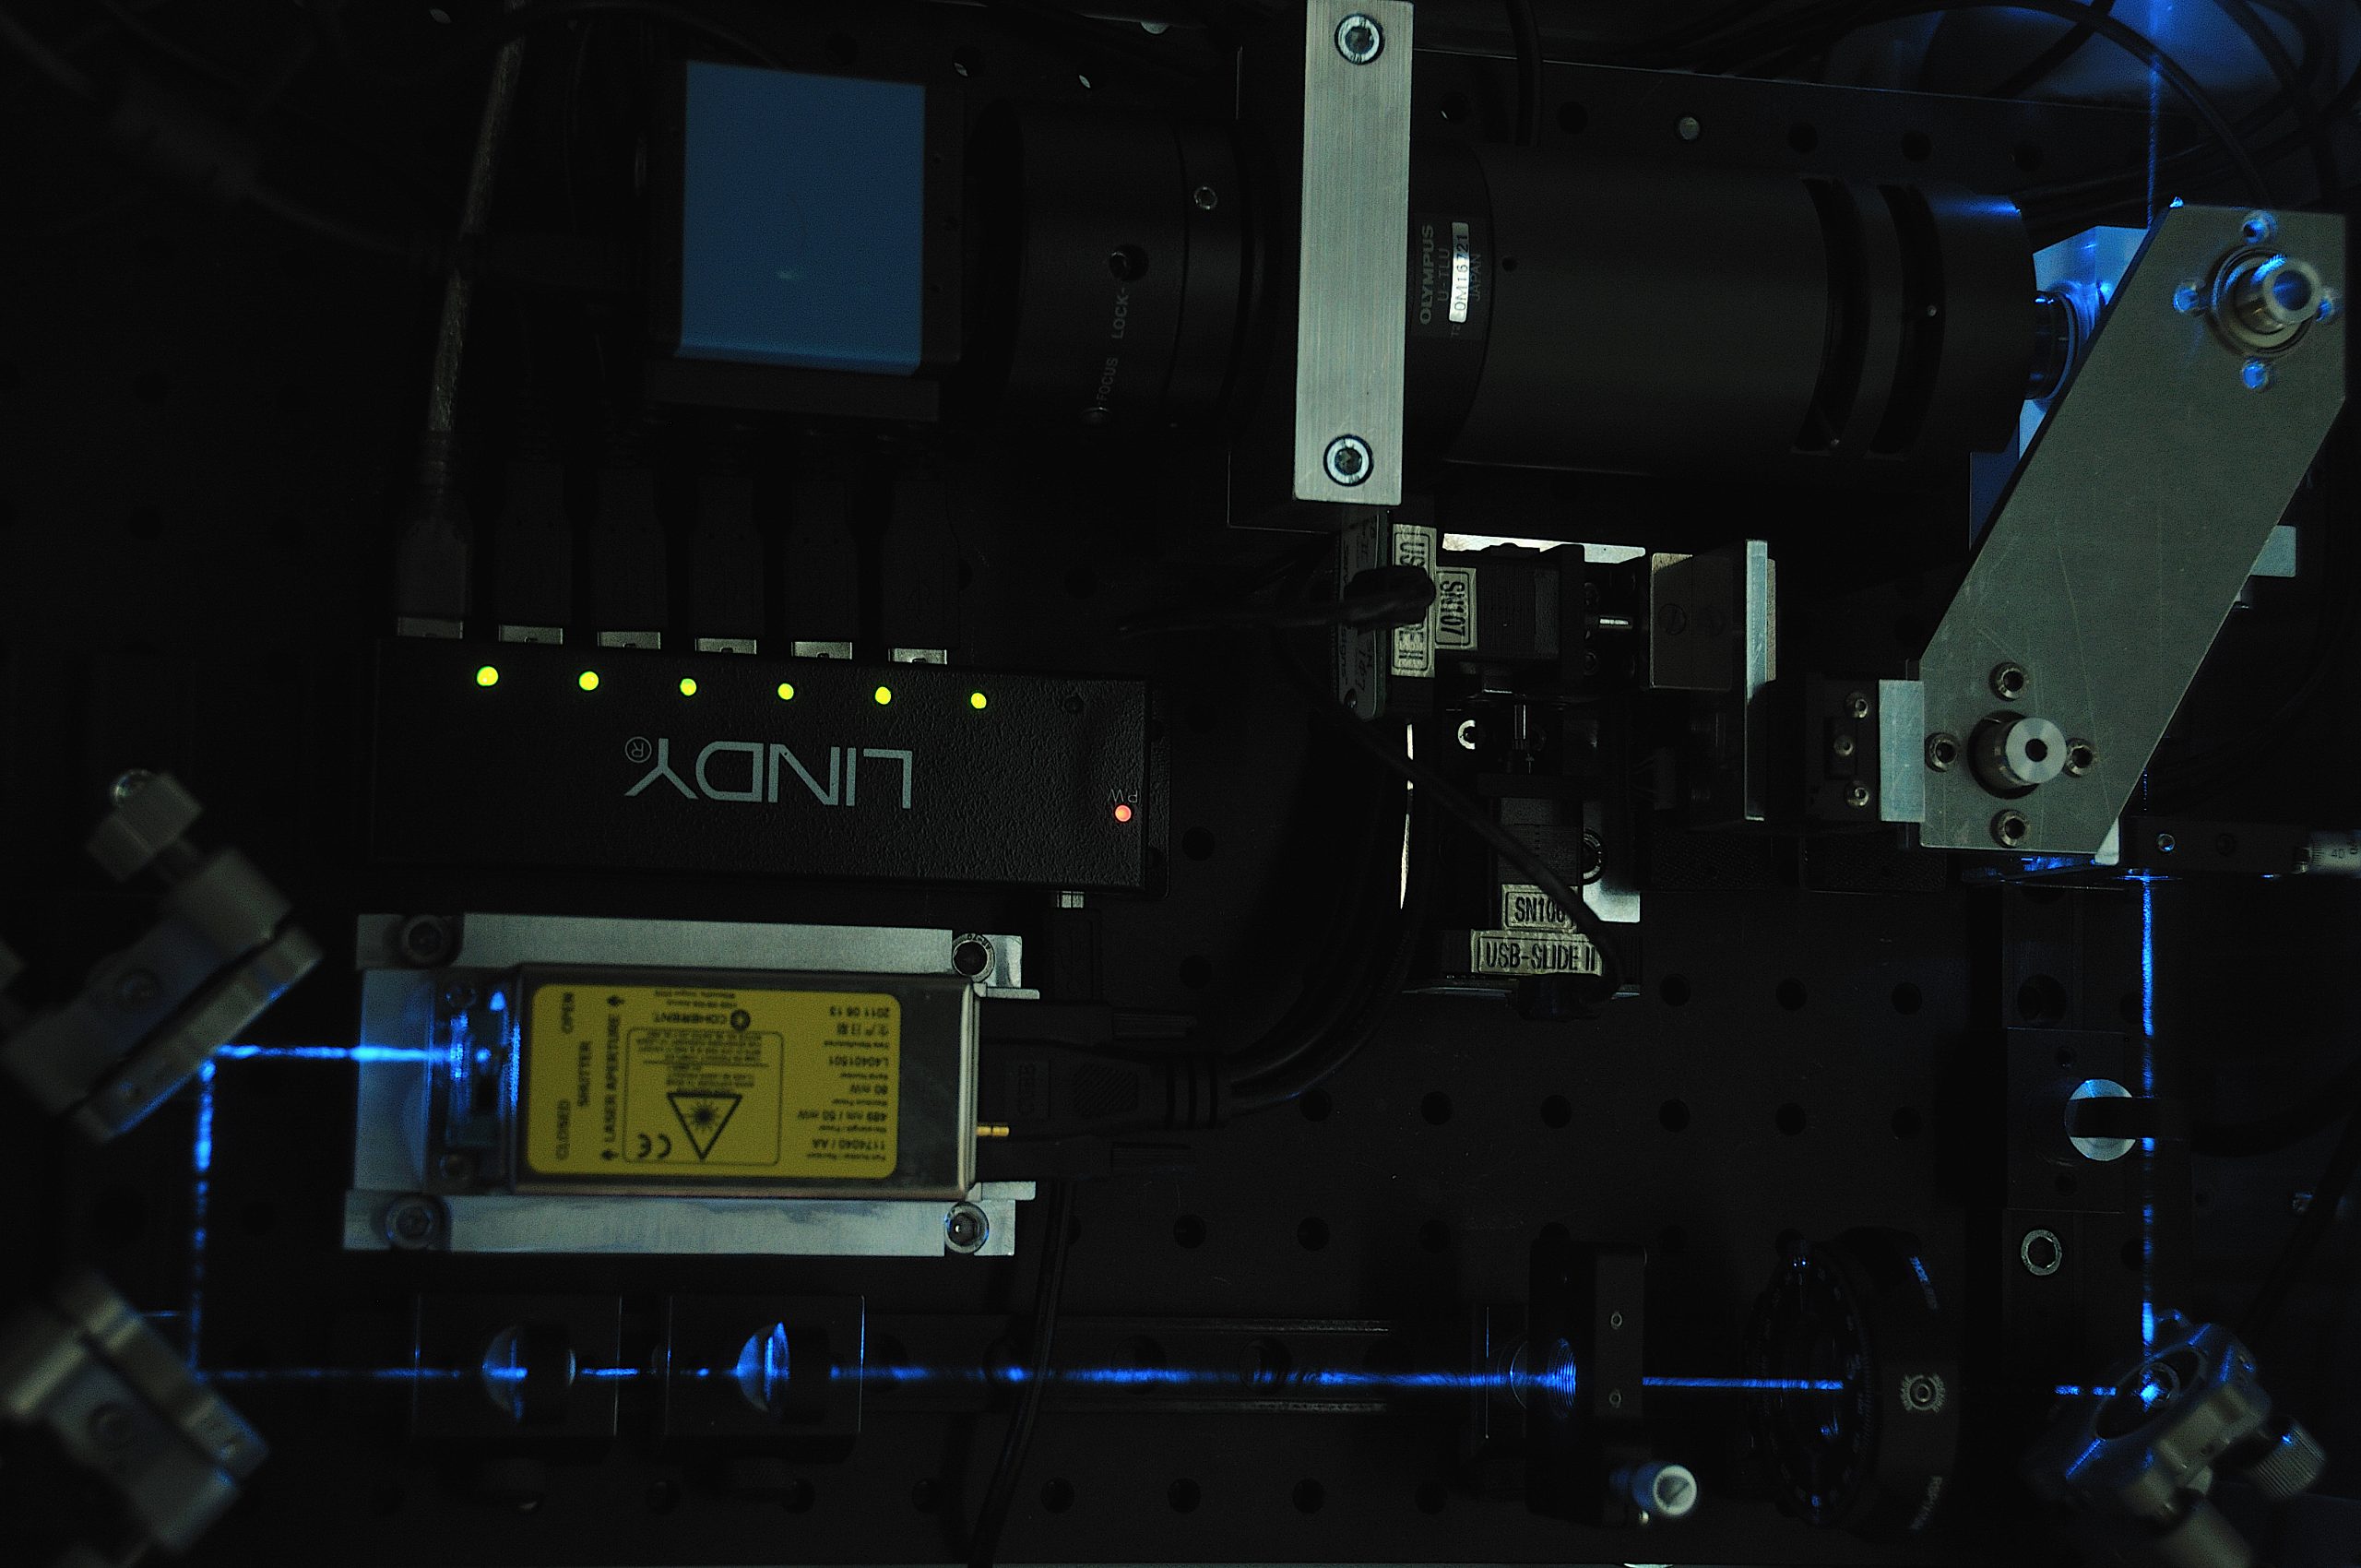
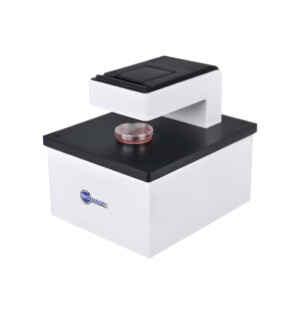
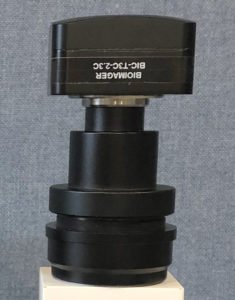
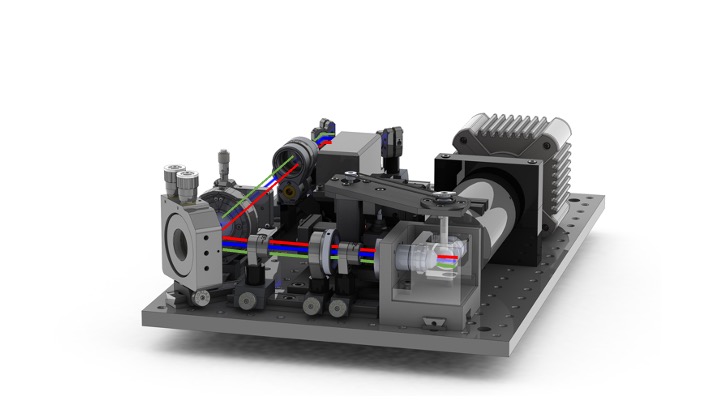
BiopenSPIM Light-Sheet Microscope
Introduction
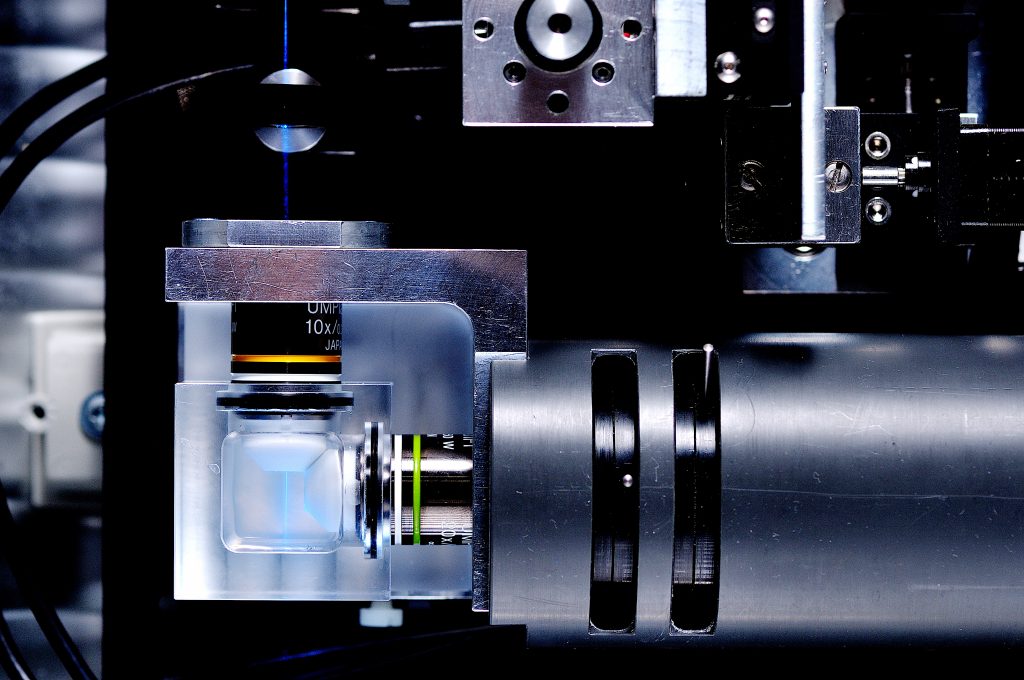
This is a complete ready to use industrial version of OpenSPIM (Open access Selective Plane Illumination Microscopy)-concept light-sheet microscope. The microscope includes one laser, two objective lenses, one motorized 4-axis stage (XY stage, autofocus, rotation), a chamber, a camera, c-mount adapter, USB hub and required cables, all installed inside a nice box. All of these parts can be customized, based on your imaging requirements, at a very reasonable price. This is the lowest price light sheet microscope package available in the market.
Specifications
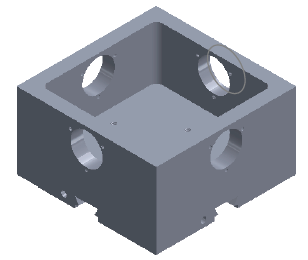
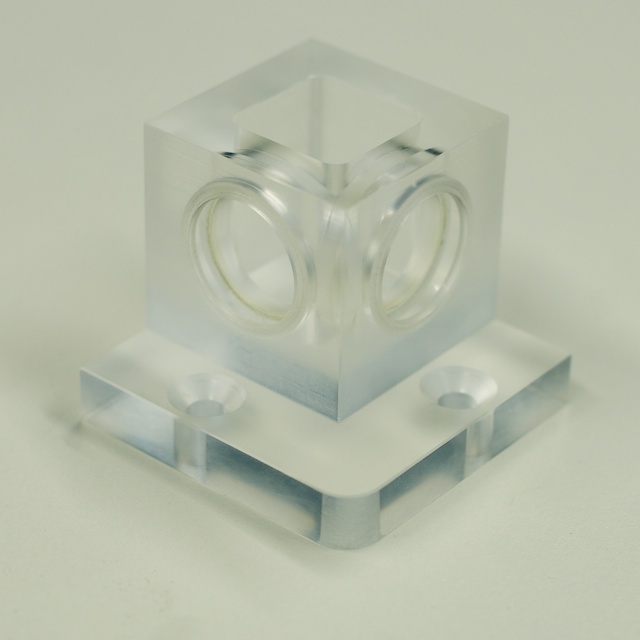
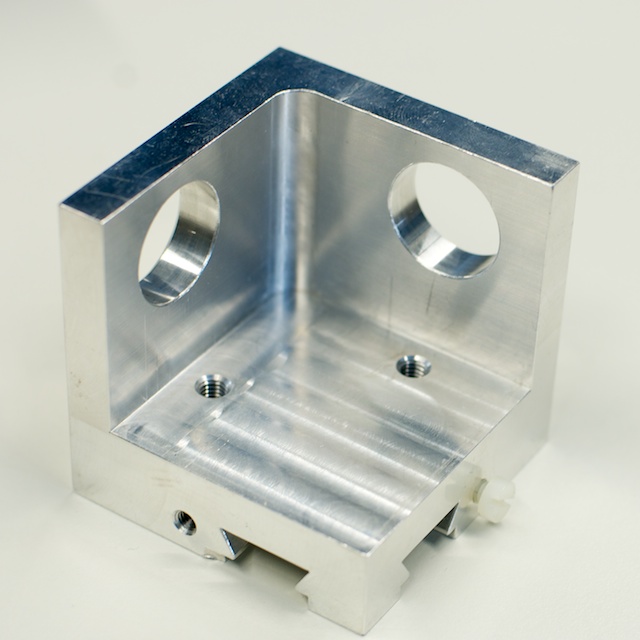
1) Chamber
Customized per application and imaging requirements:
2) Objective Lenses
We offer 4x, 10x, 20x and 40x. You need minimum two sets of these objective lenses, one for excitation and another for emission /detection.
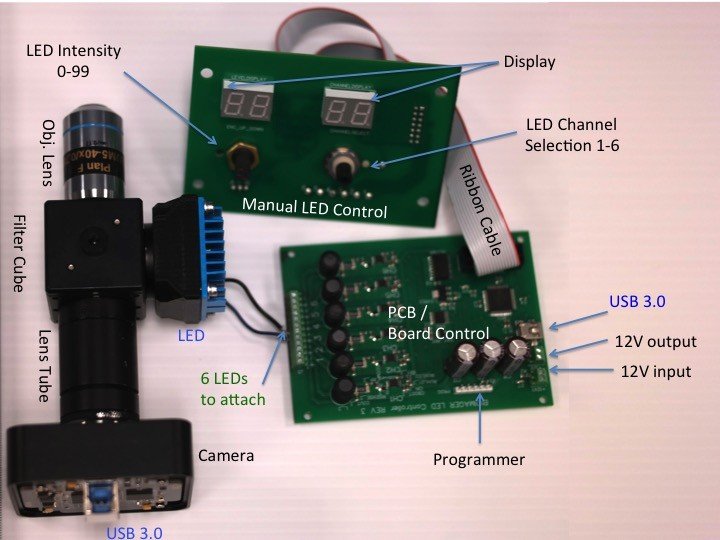
3) Laser and Filter
3B) Three-Wavelength laser (NEW)
Bioimager offers exclusively a three wavelength laser for this light-sheet microscope. Accordingly a three-band emission filter is included in the package. Three wavelengths of laser can be selected among these:
405nm / UV, 40mW, For Dapi/Hoechst (the third-fourth popular)
450nm /Royal Blue, 40mW
488nm /Blue, 30mW, for GFP, FITC (EX: 493, EM: 525), Alexa Fluor 488 (EX:495, EM: 519), Cy7 (EX: 496, EM:785) (the first popular)
520nm /Green, 30mW, for RFP, TRITC, Texas Red, mCherrym (the second popular)
638nm/Red, 40mW, for APC, Alexa 647, , Alexa 700, APC-Cy7 (the third-fourth popular)
660nm/NIR, 40mW
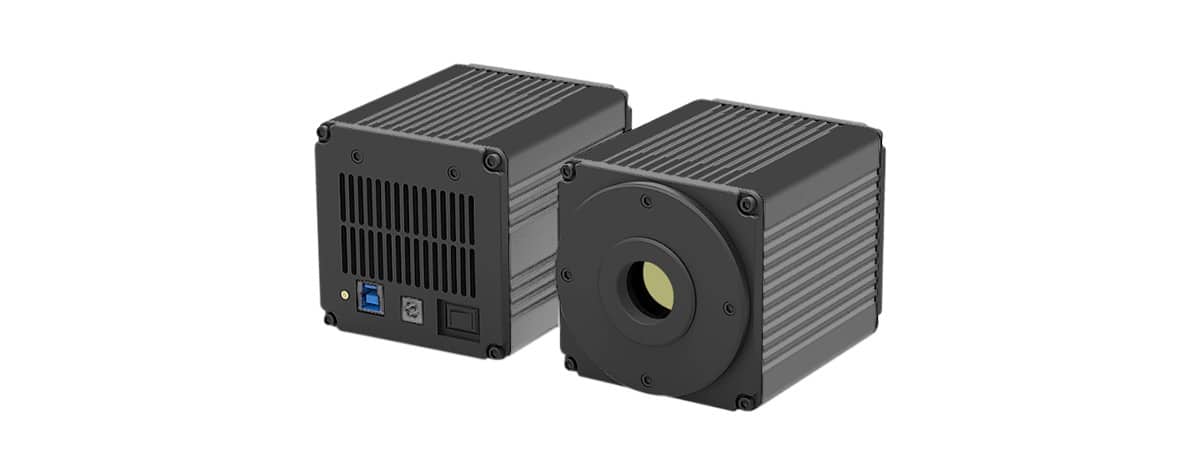
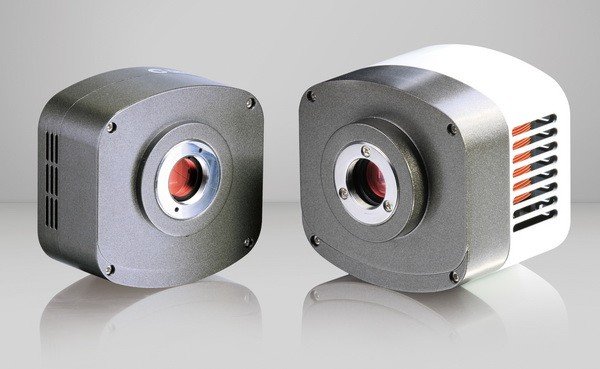
4) Camera
Many models of CMOS, sCMOs and cooled CCD cameras are available upon request.
Bioimager suggests using BioCam-HD20BW CMOS Camera, which is cooled up to -15’C, monochrome 20MP, 1″ sensor, 2.4μm pixel size, 84% QE at near 495nm, 0.001e-/pixel/s dark current, 0.6e- readout noise, 16-67fps speed at 2×2, 3×3, 4×4, 8×8 binning, 3μs-1 hr exposure time.
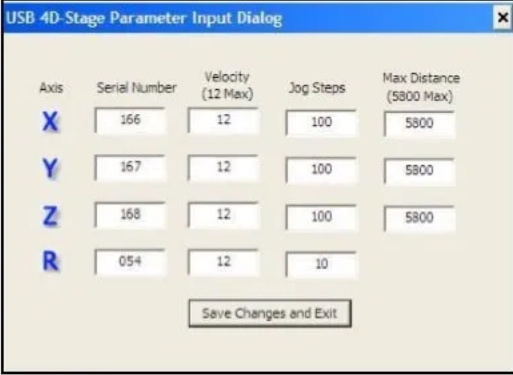
5) 4-Dimensional XYZ-R Stage
Compact four dimensional (X, Y, Z, R) Stage.
Draws power from a standard USB port with use of a externally powered USB 4-port Hub.
Fully self-contained miniature (Size-8) stepper motors, with integrated control electronics.
Linear (X, Y, Z) travel range of about 9 mm (~0.35”).
Linear slides have friction locks for transport.
Positional resolution of 1.5 microns (0.00006”).
Rotational resolution of 200 step/rev (0.5 deg).
Includes Sample-Arm with pulleys and belt to hold and rotate the Sample-Tube.
Power efficient, holds position with no power.
Built-in magnetic (Hall effect) home sensor on the linear (X, Y, and Z) motors.
PC Windows based user interface included for easy “out of the box” motion control.
Dynamic Linkable Library ( DLL) included for custom automated application.
Configuration
1) Single Channel , one dimensional illumination
Single Channel laser can be selected at visible range and infrared. Alternatively, one can get two or more light sources at different wavelengths and alternate base don the usage.
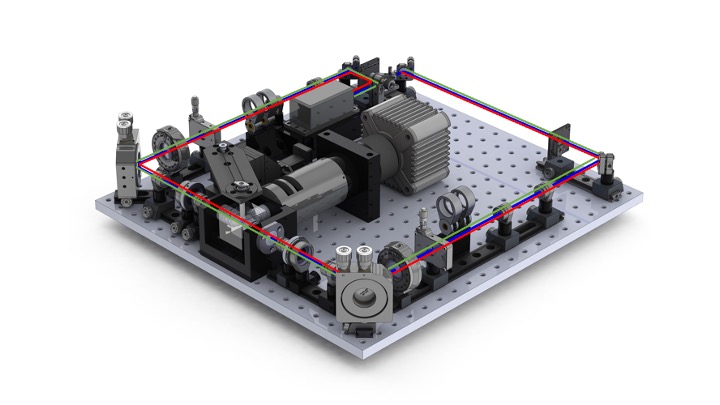
2) Single Channel, Two dimensional or double-sided illumination
Single Channel laser can be selected at visible range and infrared. Alternatively, one can get two or more light sources at different wavelengths and alternate base don the usage.
3) Multiple Channel, One dimensional illumination
Laser wavelengths can be selected at visible range and infrared,
4) Multiple Channel, Two-dimensional or double-sided illumination
Download and unpack the right (32bit/64bit) OpenSPIM-… .zip
Launch Fiji: in the OpenSPIM.app/ folder, open ImageJ-win32.exe (or -win64.exe).
Update Fiji (and OpenSPIM & µManager): Help->Update Fiji (or simply choose Yes, please if you are asked to update).
Install the camera driver if needed (see below).
Run Micro-Manager: Plugins->Micro-Manager->Micro-Manager Studio.
Note: if you are interested in building the software from scratch so you can modify it to your heart’s extent, please have a look at this page.
Drivers
Most of the drivers are shipped within µManager, bundled in our OpenSPIM software. However, some µManager drivers require separate installations (such as, in the case of the OpenSPIM version 1.0 setup, the camera driver).
When Micro-Manager is first started, it will prompt the user to select a hardware configuration (defaulting to none).
To create a hardware configuration to use, go to Tools->Hardware Configuration Wizard… and select Create new configuration.
From the Available Devices list, expand CoherentCube or Omicron and add the ‘CorentCube ‘or ‘Omicron Laser Controller’ device. Select the appropriate serial port and RS 232 settings and click OK. Ensure the BaudRate property is at 19200 for the Coherent Laser or 500000 for the Omicron laser, or the computer will not be able to communicate with the laser.
From the HamamatsuHam category in the Available Devices list, add the HamamatsuHam_DCAM device. No further configuration is needed for the camera.
Finally, from the PicardStage category, add in turn the twister, Z stage, and XY stage devices. The software will attempt to guess the correct serial numbers for the motors; these should be verified and corrected as necessary.
Once these five devices have been added, click Next. On the following page, default devices are specified. The camera and shutter should already be set to HamamatsuHam_DCAM and CoherentCube / Omicron Laser Controller, respectively, but the user will need to set the default focus stage to Picard Z Stage. Leaving Auto-shutter enabled, click Next. The laser does not require a delay, so the setup can advance without any changes on this page. As there are no state devices to set up, the following page can also be skipped. On the final page, the user can specify a file to which the configuration will be saved before finishing the wizard.
Once the hardware configuration has been loaded, the OpenSPIM plugin can be opened using Plugins->Acquire SPIM image. At this point, µManager’s Snap/Live Window will be opened along with the OpenSPIM GUI.
Reviews
There are no reviews yet.
Only logged in customers who have purchased this product may leave a review.


 3) Laser and Filter
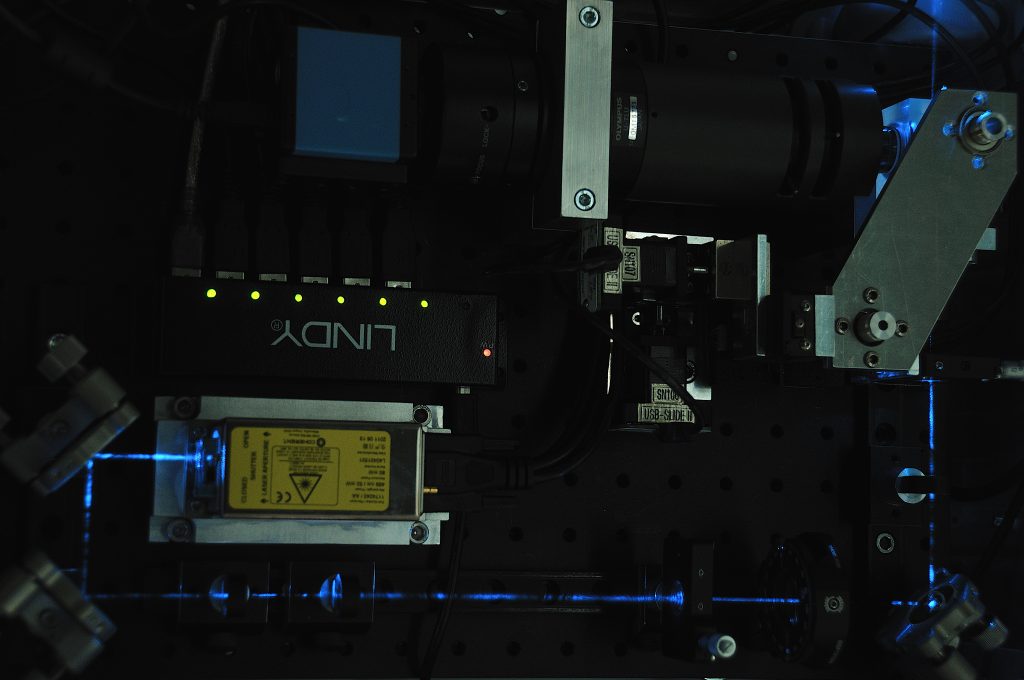
 1) Single Channel , one dimensional illumination
 2) Single Channel, Two dimensional or double-sided illumination
 3) Multiple Channel, One dimensional illumination
 4) Multiple Channel, Two-dimensional or double-sided illumination
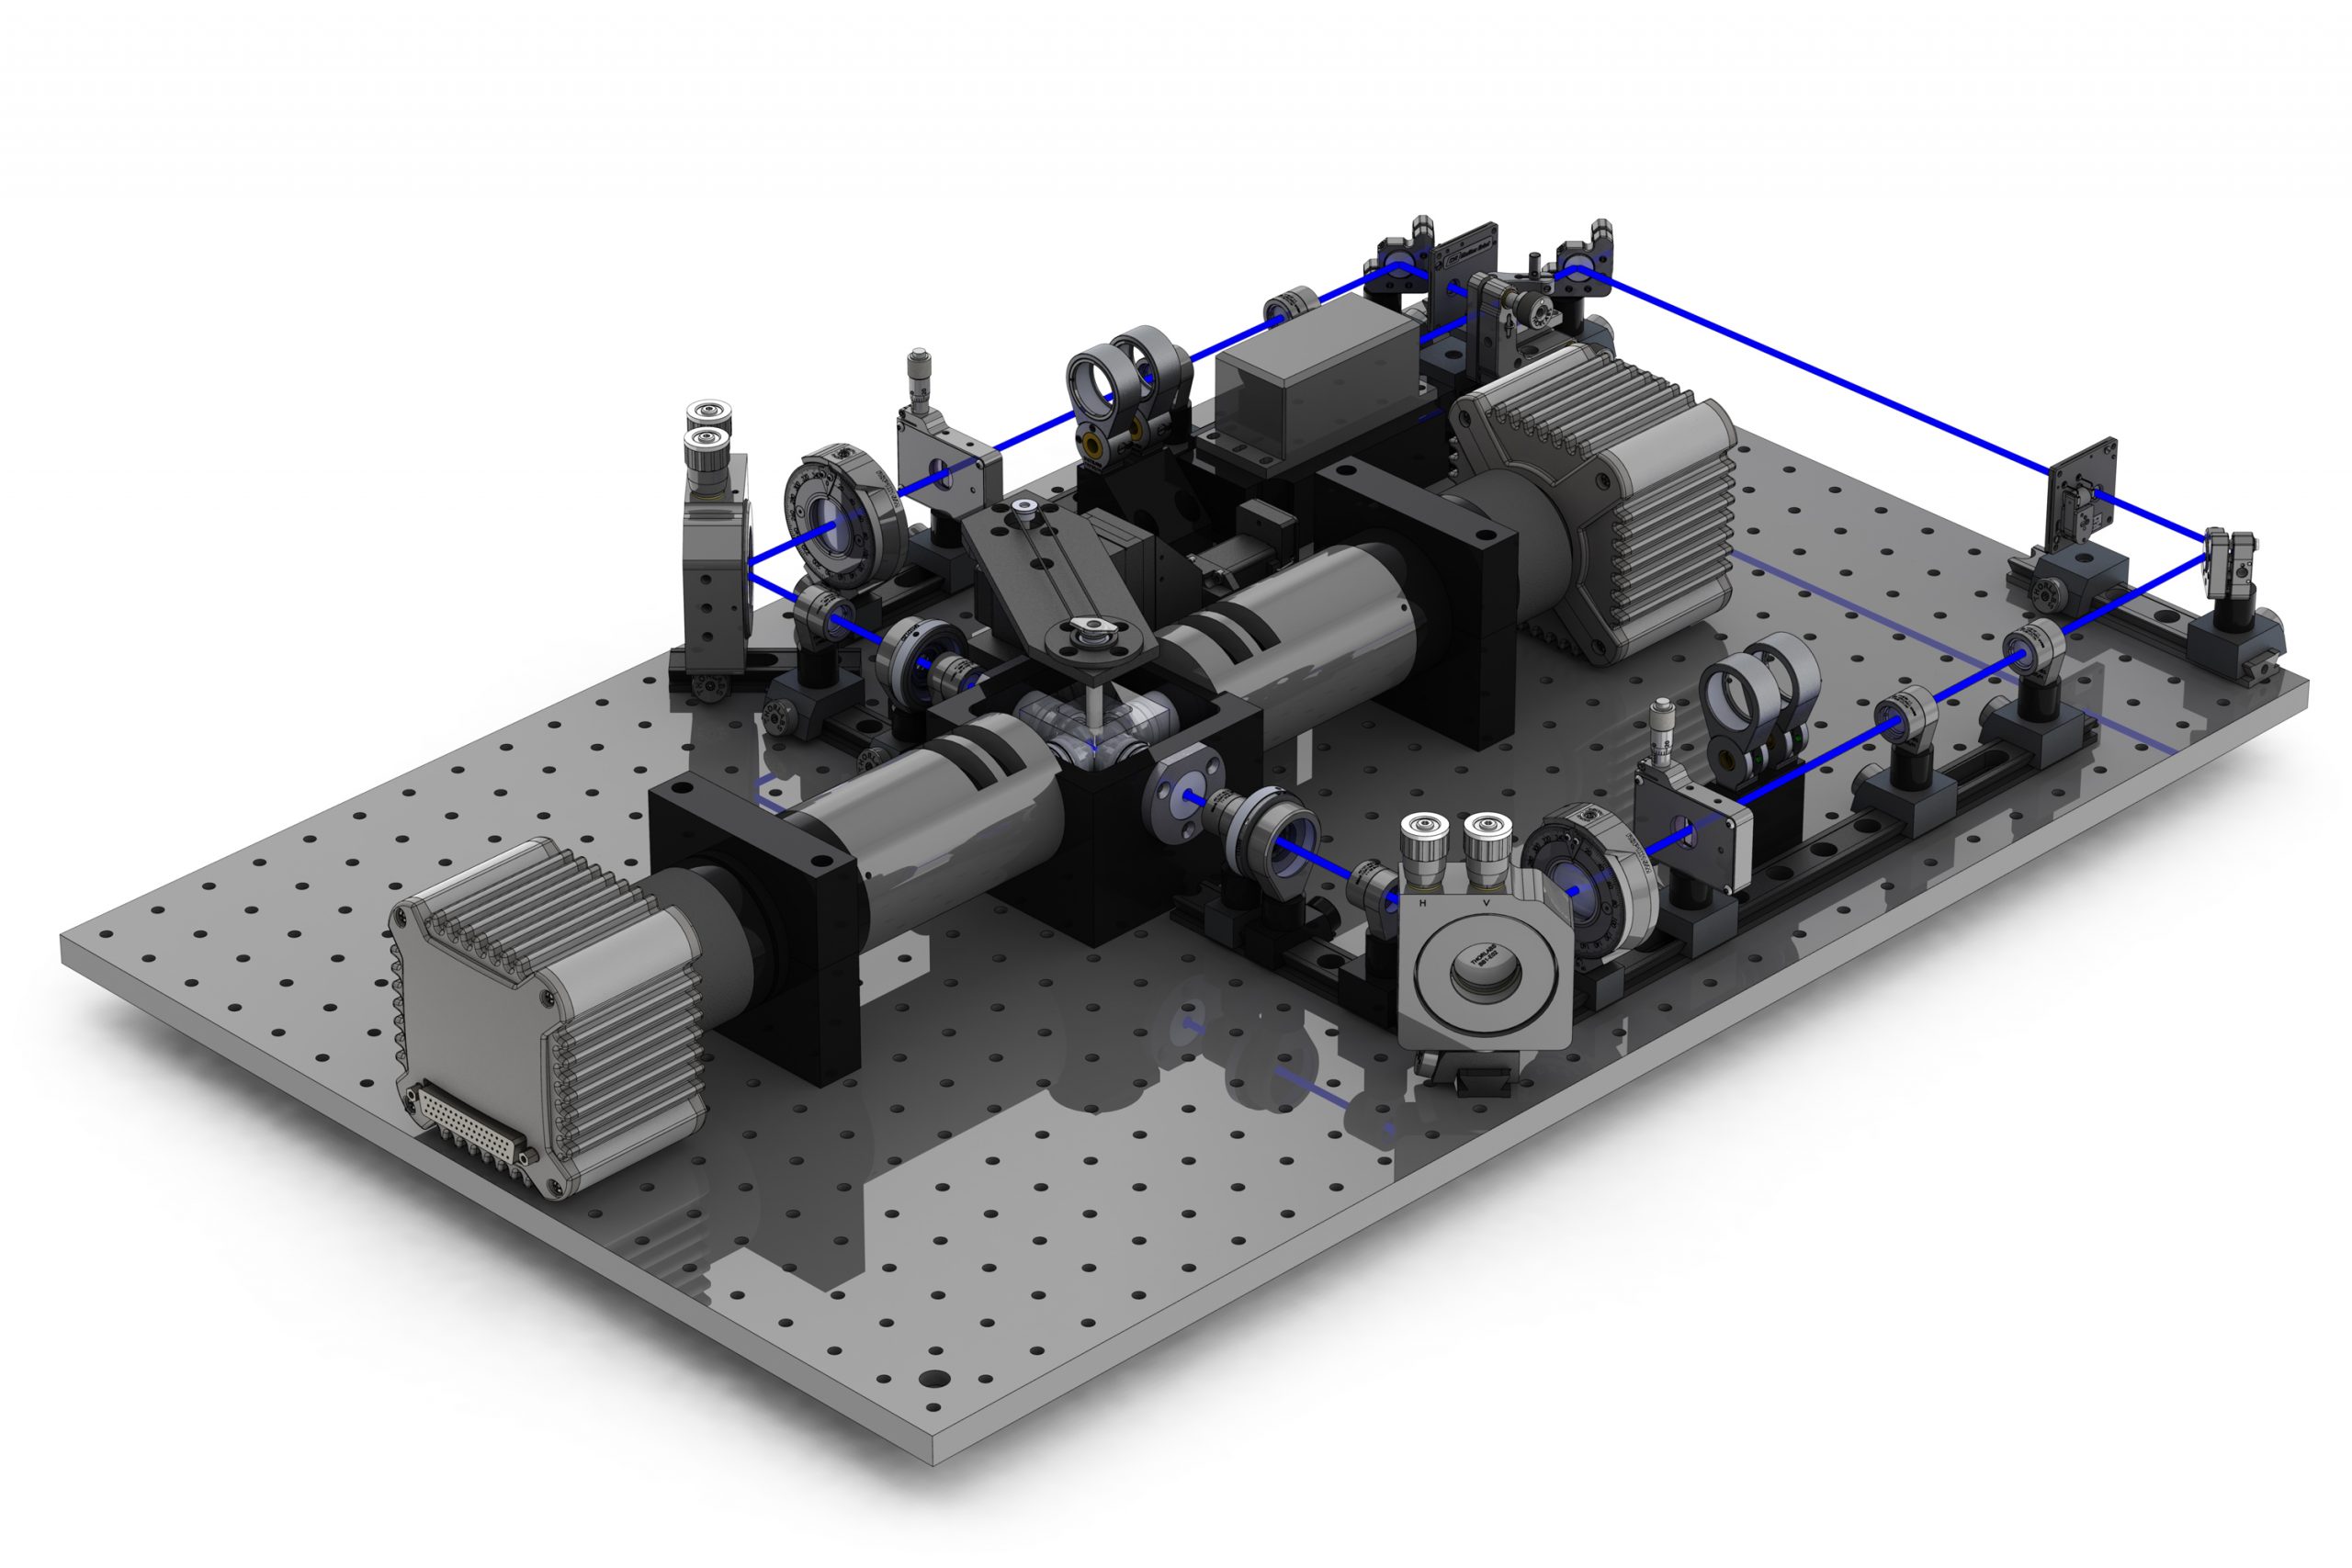 Two Dimensional Two camera System
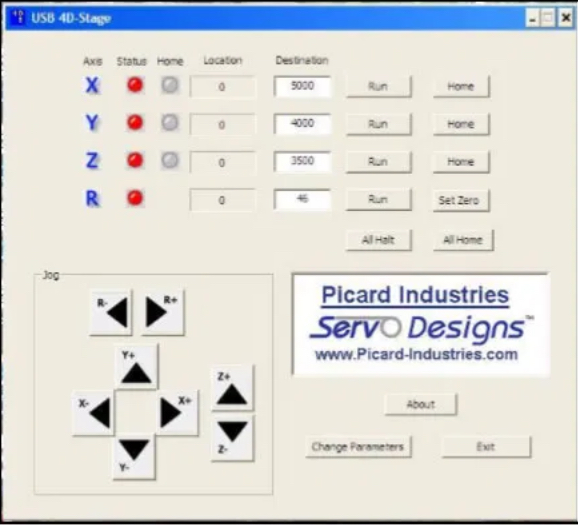

Reviews
There are no reviews yet.