Metallography: Part 1- Macroscopic Techniques
Metallic materials are widely used in many areas of everyday life. How are they built up in their inside?, Are there perhaps crystals to be found and if so how big are they? What kinds of crystals are there? What is their shape? and Are there voids or inclusions? Metallography gives an answer. In this page, we would like to introduce the macroscopic techniques of metallography. Macroscopic means to investigate a work-piece over a comparatively large area. Doing this only a little or no magnification is required. Often the naked eyes are sufficient to examine the material.
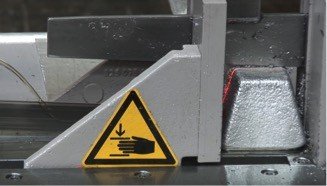 As a first sample, we are going to investigate an ingot made from an aluminum alloy. To have a look at the inside the material, a tester has to start with a raw cut through the ingot. He/she picks up the ingot and carries it from the laboratory to the mechanical workshop. The bandsaw machine has already been prepared. The ingot is positioned on the sole table. So, a red laser marking line indicates the intended cutting plane, clamping jaws fixed the ingot securely. Then, the bandsaw gently sets onto the block and cuts it slowly under intensive liquid cooling. It is important to keep the material as cool as possible to avoid changes in the material structure. That’s it.
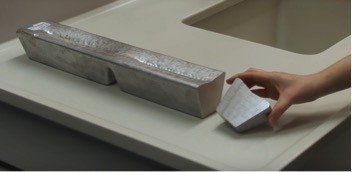
The ingot has been sectioned. Back into the lab, not much is to be seen on the cross-section apart from the typical saw marks. In the next set the material tester removes the saw marks by careful wedge grinding with silicon carbide paper. On the one hand, this serves to produce a flat surface on the other hand. The plastic deformations are removed that were generated by sawing after the first grinding operation with coarse-grained paper. The material tester rotates the sample by 90 degrees and grinds it once more. This time with medium grained silicon carbide paper. Here again she uses sufficient flushing with water. This keeps the sample cool and prevents the abrasive paper from being loaded with material particles. Now a flat medium ground surface has been created but apart from the grinding marks nothing special can be seen. Our sample reveals its structure only by the final etching process. After washing and drying the sample, the material tester dips the ground surface into a suitable etchant.
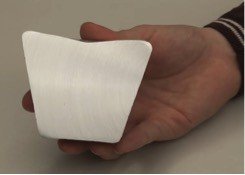
In this case the etchant consists of a mixture of different acids, in which special care should be taken. In this case, the material tester protects herself with a lab coat, special gloves and safety glasses. After half a minute of contact time with the etchant she washes the sample thoroughly with water and gently wipes off the gray coat of particles using cotton wool. In the last step, she rinses the clean surface with alcohol and lets it dry under a hairdryer. Now the specimen preparation is finished, Beautiful, bright and dark shimmering crystals can be seen.
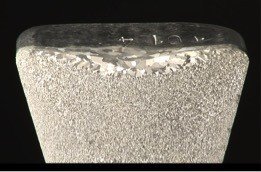 In technical terminology, these crystals are called grains. In the central and lower region of the sample, the grains are comparatively small. They are hardly visible with the naked eye but in the upper part, large individual grains may clearly be distinguished. But, why are the grains only visible after etching? The reason for this is that the etchant structures the material grains on the surface according to their crystal orientation, experts call it grain contrast itching at lateral illumination. The individually structured grains reflect the light in different directions and the grains become visible.
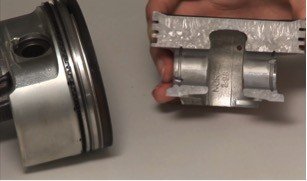
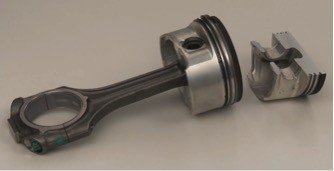 As a second sample the material tester examines a piston from a petrol engine of a passenger car. The procedure is the same as before: careful sectioning under liquid cooling is followed by wet grinding with coarse-grained paper then wedge grinding with medium grained paper and finally the decisive step: the etching. After washing, cleaning and drying. Fantastic crystals are visible. Again it should not be concealed that these crystals, these grains are not perfect and uniformly structured crystals, but so-called primary grains. Within the primary grains, many other very small crystals and also crystal defects may be found but these can only be seen with appropriate microscopes.
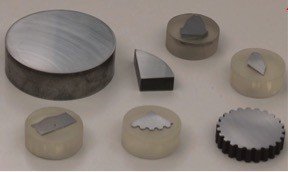
 Virtually all materials of our world can be examined metellagraphically. To show part of that variety, we will look at some additional and test pieces made from different steels. All of these samples have been sectioned first. Some of them are so small that they have been mounted in resin for easier handling and all of the samples have been wet-ground with medium-grained abrasive paper. This was done towards the end of the preparation as shown here in the case of the tooth of a gear wheel. After grinding not much is visible, except from the typical grinding marks. As before, the internal structure will only be revealed by etching but now the material tester uses a different etchant. This time it is nitric acid diluted in ethanol she holds the mounted sample with pliers and immerses it into the etchant after a few seconds she takes the sample out again washes it thoroughly with water then with alcohol and finally dries it with a hairdryer.
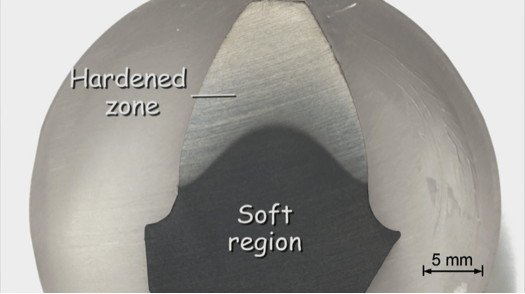
 Now the preparation of the flame-hardened tooth of a gear wheel is finished. In this case the individual grains cannot be seen. They are far too small but what may be seen very well is the hardened zone, which appears light and the central soft and tough region, which appears dark.
 Next in line is the section of an induction hardened cylindrical shaft. The comparatively soft core is much more affected by the etchant than the hardened surface layer.
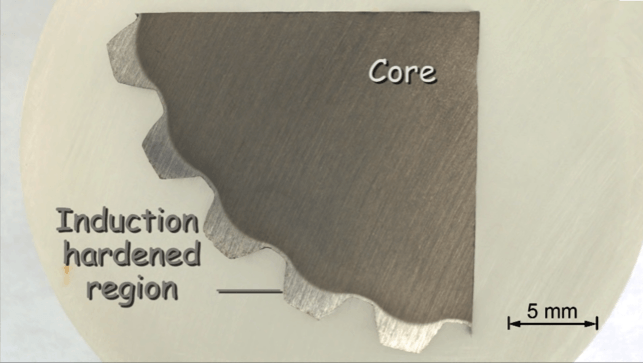
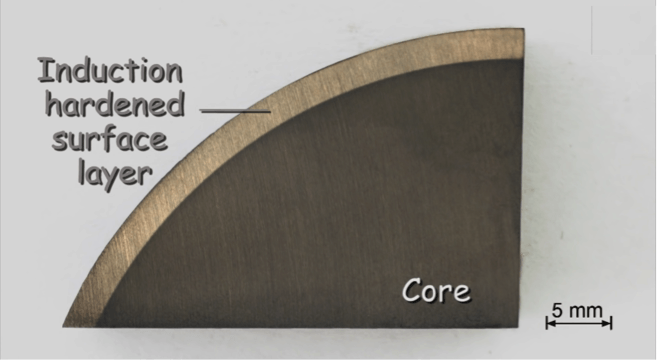 Clearly the induction hardened surface layer can be distinguished by its light color from the darker core. This section of a spline shaft is induction hardened as well as a result of the etching process. The outline of the hardened surface layer may easily be recognized.
 The dark area represents the core that has not been hardened. This is a tooth from a case-hardened gearwheel. The surface region of the gear wheel has first been carburized at high temperature and then quenched. The edged sample shows the smooth transition from the cob your eyes and hardened surface region to the softer interior weld joints can also be examined metalographically. In our case the etching process takes a little more time and the analysis is more difficult but by and by the structure inside the steel plates.
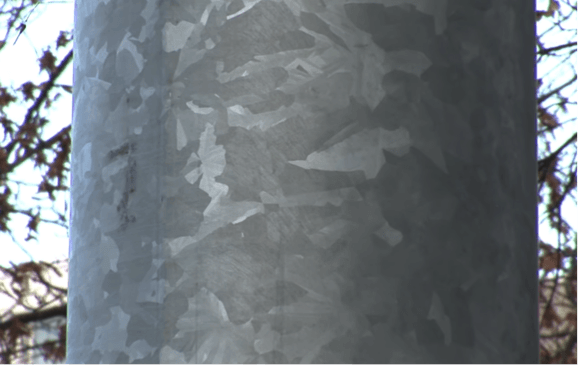
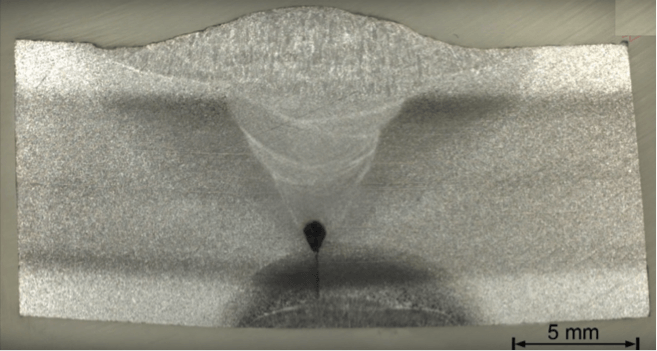 The position of the weld passes and the heat-affected zones may be identified with a skilled eye. Even in everyday life one meets metallography at this hot-dip galvanized lamppost. The rainwater has acted as an etchant over the years the large flat zinc crystals have been structured on the surface and can be recognized as so-called spangled even inside of a thin plate steel can crystals are visible.
 The fruit acid of pineapples has etched the flat crystals of the thin coating a natural and unintentional a grain contrast itching process has taken place on the outside the tin coating is still unchanged and shines like new.

